Category Archives: Decor

Ninja vs. Godzilla Birthday Party Prep!

My little ninja has been obsessed with ninjas (see last years Ninja Turtle birthday), so we’re throwing him a ninja vs. godzilla birthday at SkyZone where the kids can practice their ninja flip kick skillzzz :)

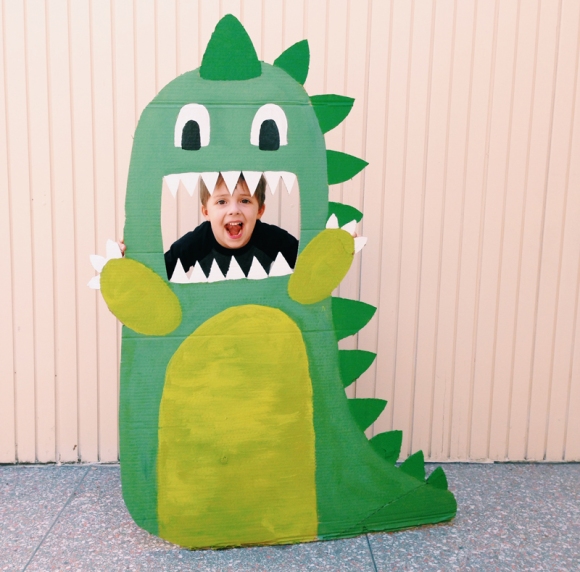
I created this rad godzilla for ninja training by cutting out a large piece of cardboard and painting it with poster paint. The plan is for the kids to chuck foam ninja stars through his mouth and win fun prizes.
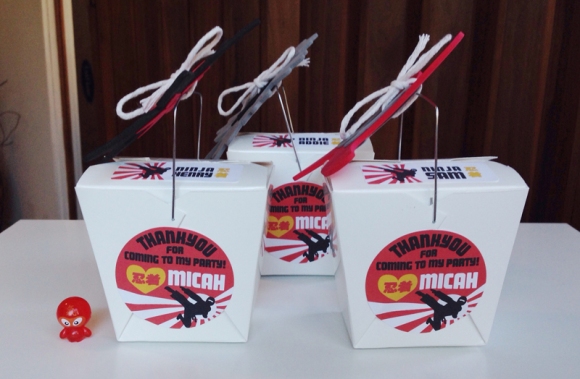
Take-out boxes are super cute for party favors. I filled them with tiny ninja figurines, temporary tattoos, edamame jelly beans, and a ninja star on top.
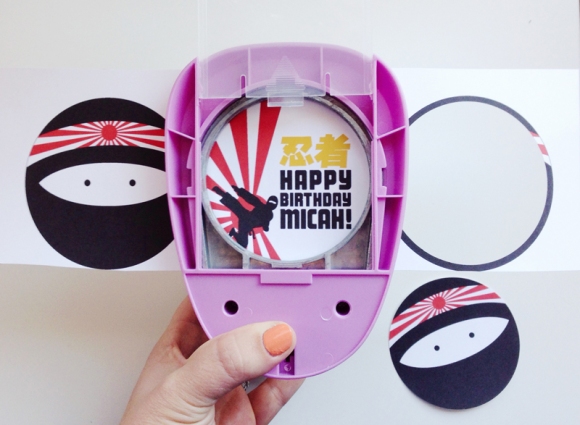
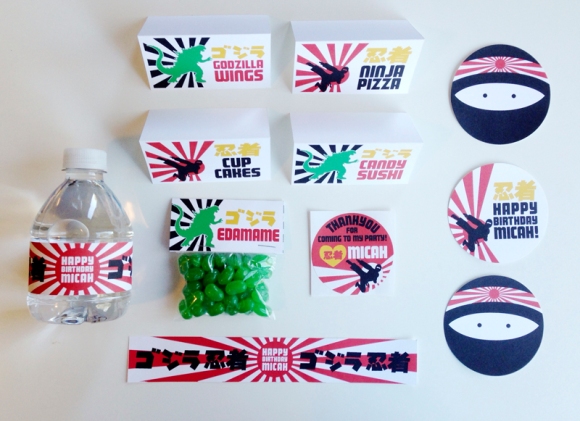
I designed and printed all the paper goods. These party circles are a cute and easy way to top cupcakes. I printed them on cardstock and punched them out with a 3″ round punch I bought from Michael’s for under $10. Then I taped them onto popsicle sticks to put on each cupcake.
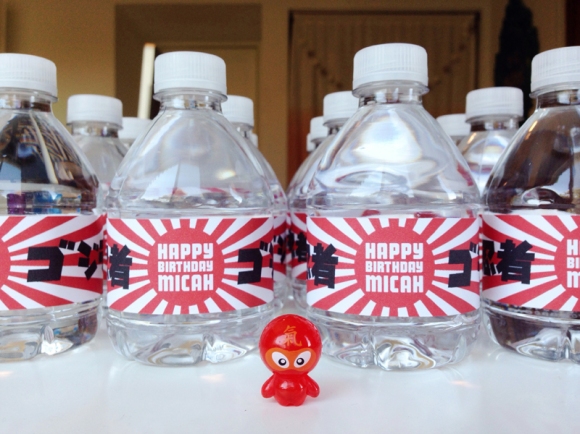
I created stickers, water bottle wraps, food signs, and edamame baggies filled with green jelly beans. I’ll post a DIY tutorial for the edamame coming soon! :)
Happy Ninja Birthday!

Follow me on instagram + twitter for more creative ideas & DIY projects!

Tagged , , , , , , , ,

Summer Farmer’s Market Birthday Party

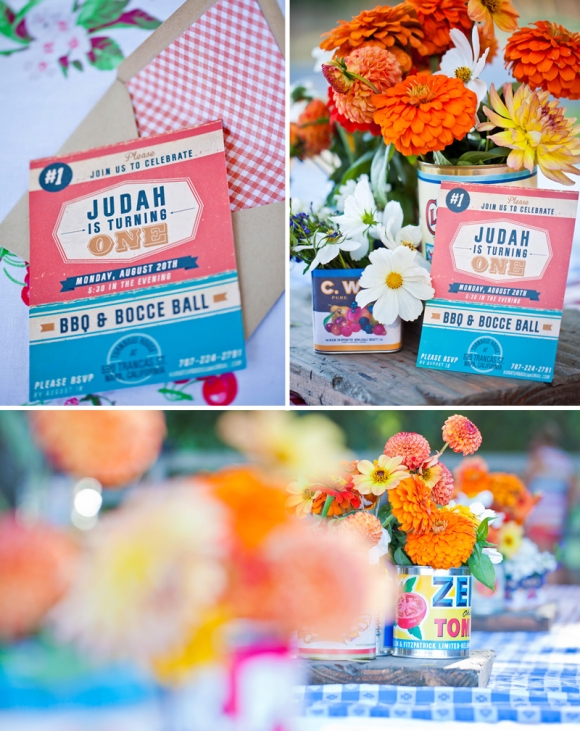
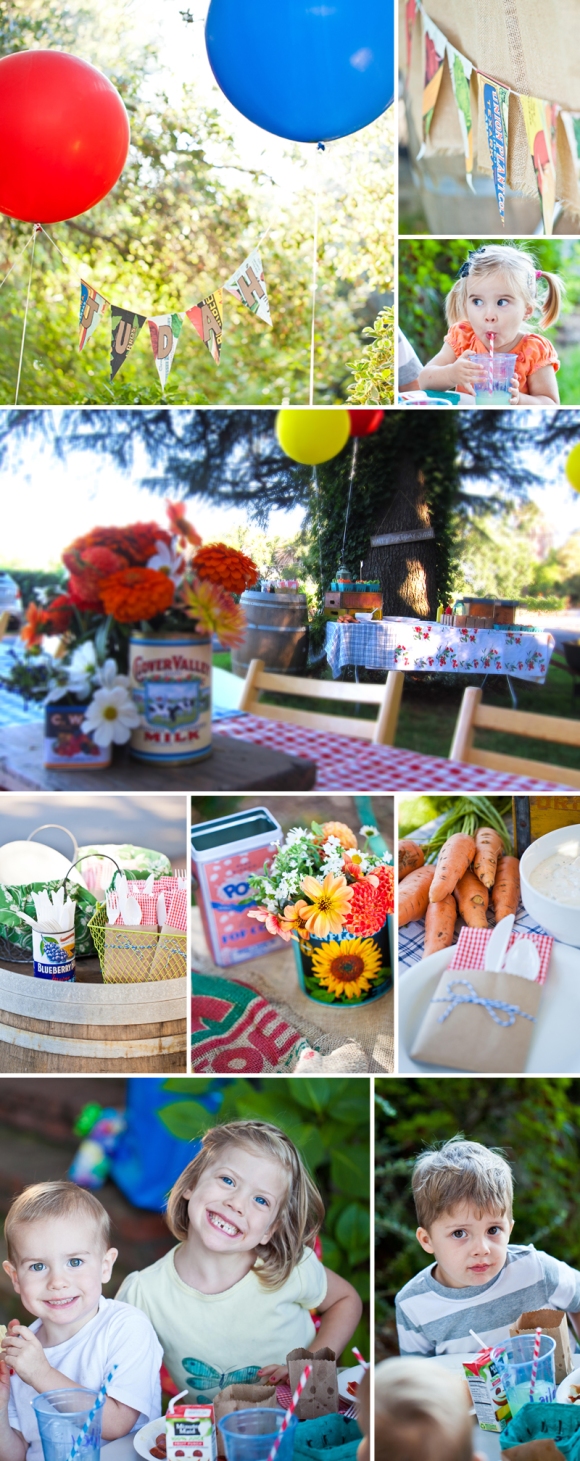
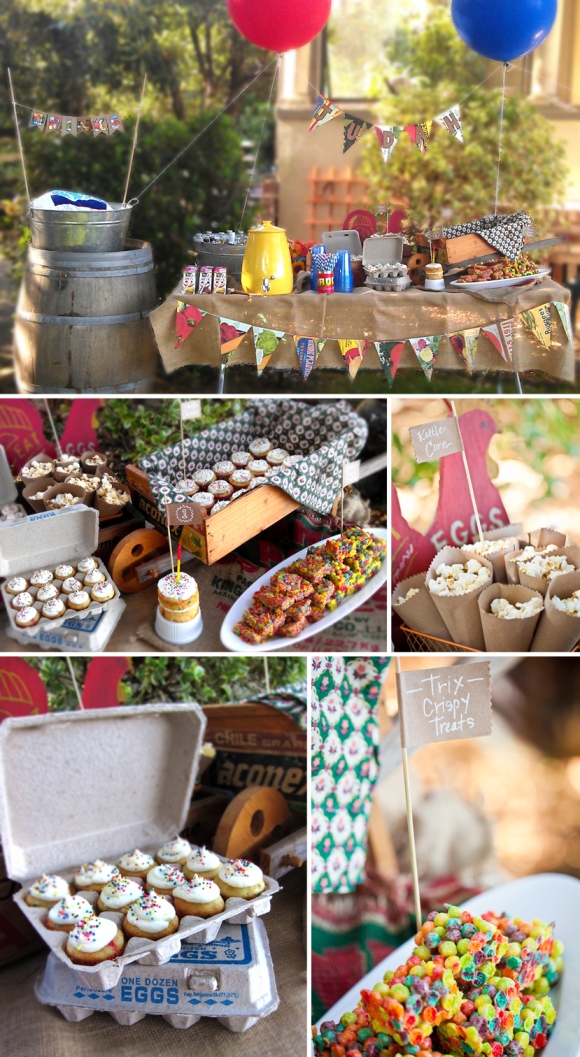
What’s a more perfect way to welcome summer than to throw an outdoor bash? I wanted to put together a festive BBQ, inspired by the amazing farmer’s markets that are so well known to California summers. This was a very DIY heavy party, as I needed it to stay low-budge, as always. :)
eyeheartprettythings+farmersmarket+birthday+invite
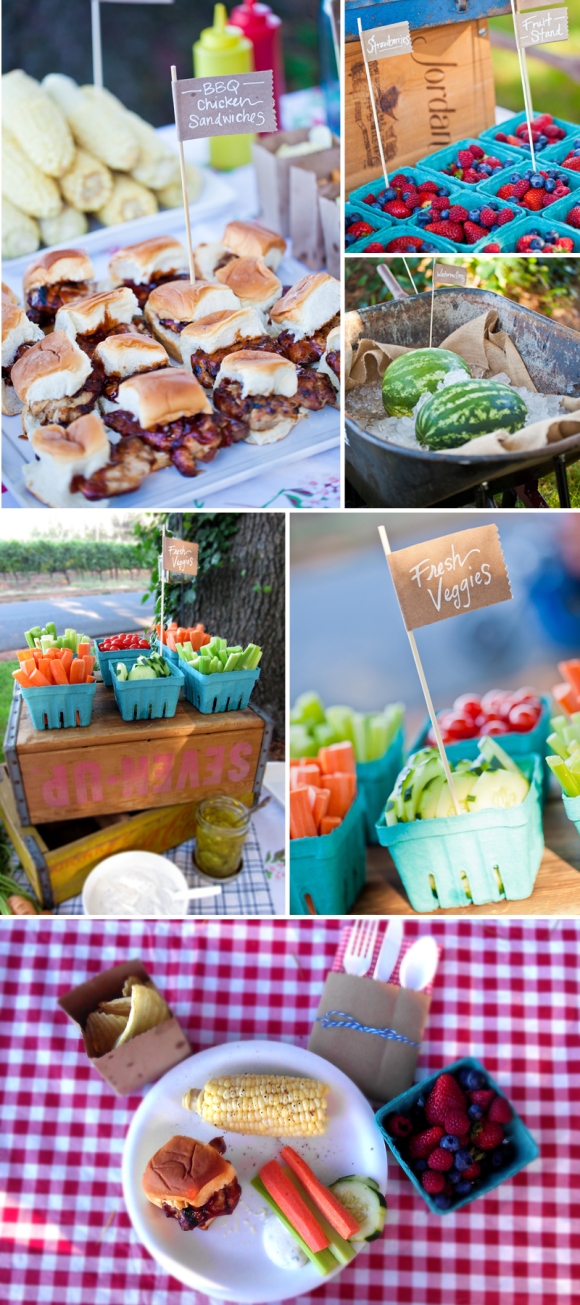
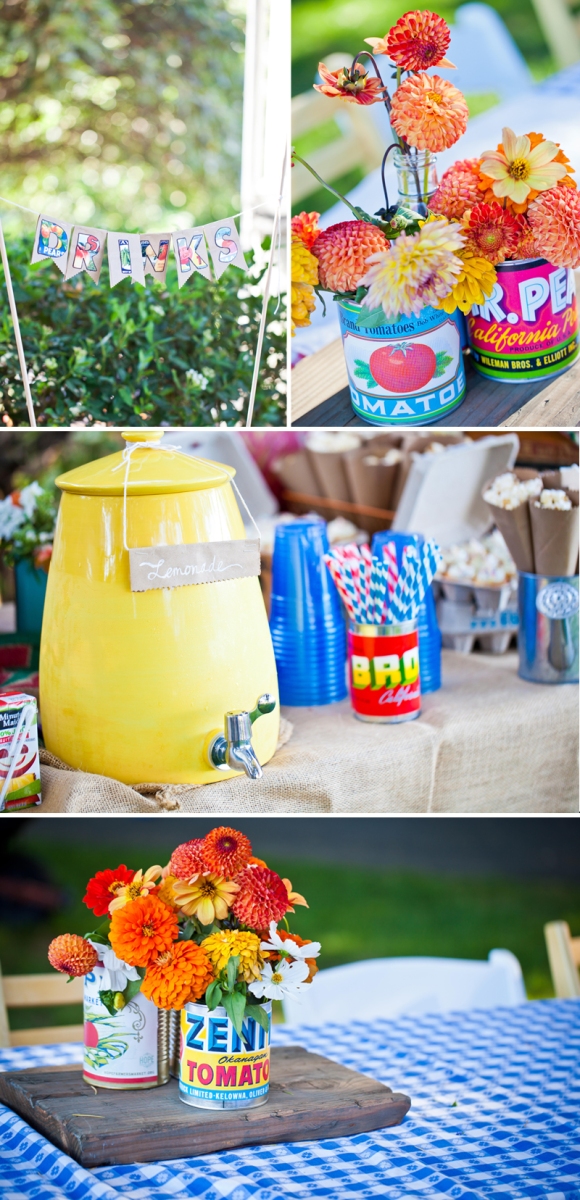
Some of my favorite details from this party are the paper goods and the cartons. Finding real, true vintage cans is not-so-easy. So I decided instead to create my own. All of the can labels I found online, printed and glued on myself. I’ve been saving large, extra large, medium and small cans for months. :) The vintage egg cartons and the turquoise berry baskets I found online from Bake it Pretty, and I couldn’t imagine the party without them. And you can’t have a party without paper straws, so the striped red and blue straws I found online from Can do Chefs.

I went to my local Joann’s fabric store and bought a yard of tiny red and white gingham fabric, which I cut into squares and folded into napkins. I also bought several yards of burlap and a large scale red and white checked fabric to use as tablecloths, much cheaper than buying a finished tablecloth. The loose cut of the fabric added to the rustic feel, so I didn’t mind the edges being unfinished.

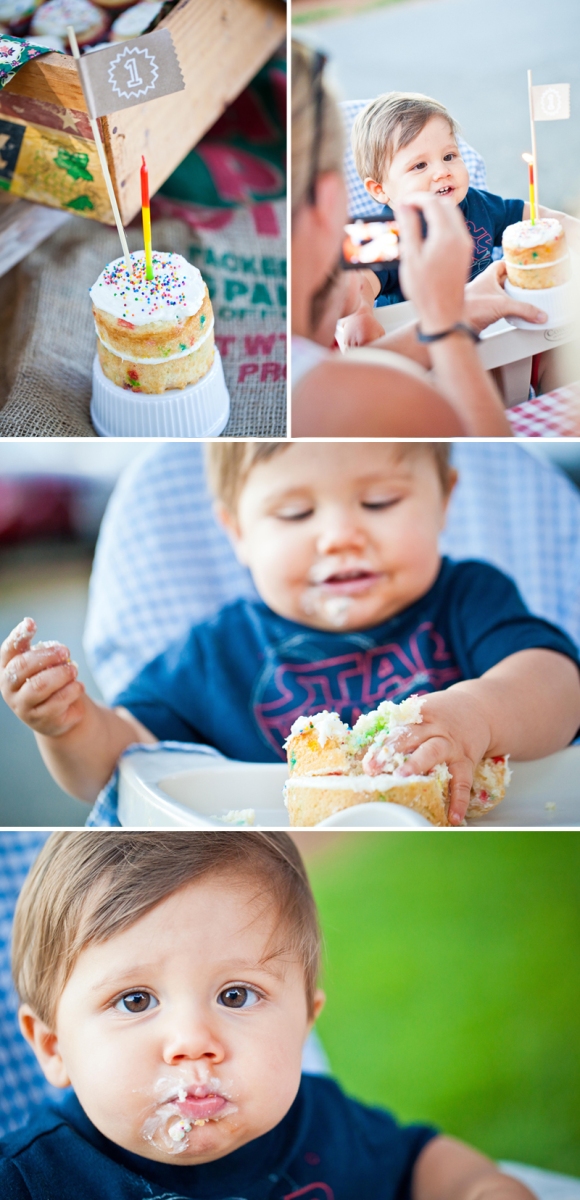
All the wire baskets and galvanized tubs were a slow collection from thrift and garage sale shopping. The flowers are wild flowers from friends gardens. No time to bake a cake from scratch this time around, but funfetti mini cupcakes fit the theme, lol. Overall the party was a wonderful summer gathering to celebrate our little one’s first birthday. We were overjoyed to share to occasion with all of our close friends and family :)

For a behind the scenes look at some of the DIY projects, go here.

Credits:
Party planning + decor: eyeheartprettythings
Flower arrangements: eyeheartprettythings
Photography: C.M.Elle Studios
Paper goods + Invitations: eyeheartprettythings
Craft supplies: Joann’s Fabrics and Michael’s
Extra Large Balloons: Bargain Balloons
Food + Cupcakes: eyeheartprettythings  + Pillsbury :)

eyeheartprettythings+farmersmarket+birthday+partyeyeheartprettythings+farmersmarket+birthday+foodeyeheartprettythings+farmersmarket+birthday+drinks+flowerseyeheartprettythings+farmersmarket+birthday+desserteyeheartprettythings+farmersmarket+birthday+boy+cake

Tagged , , , , , ,

Pineapple Hyper-color Birthday!

eyeheartprettythings-pineapple-birthday-1

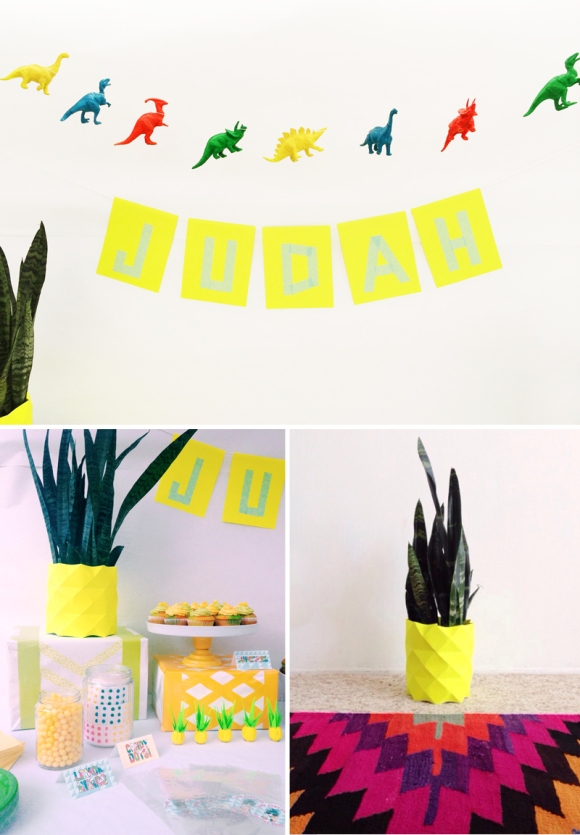
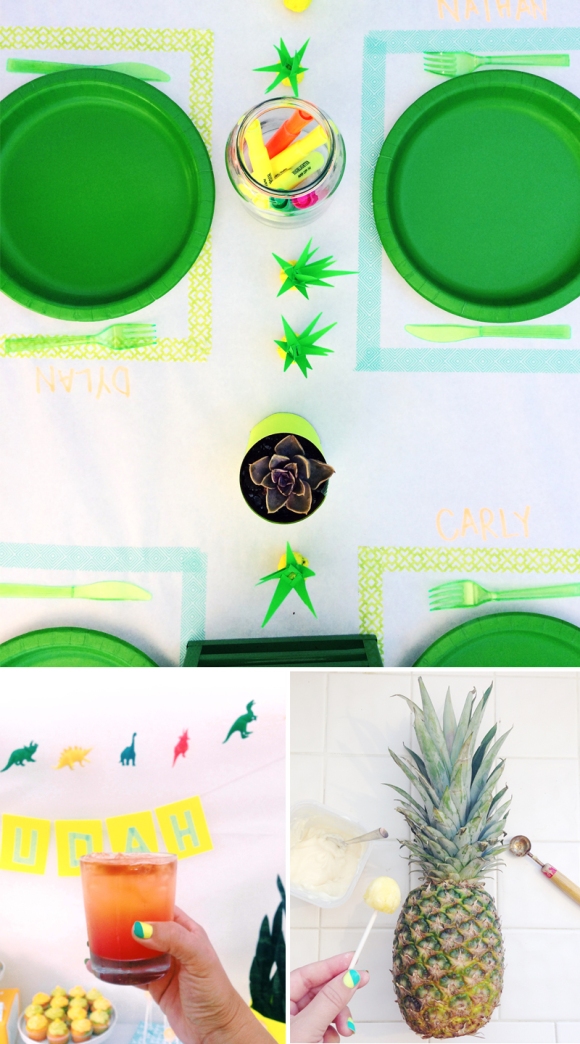
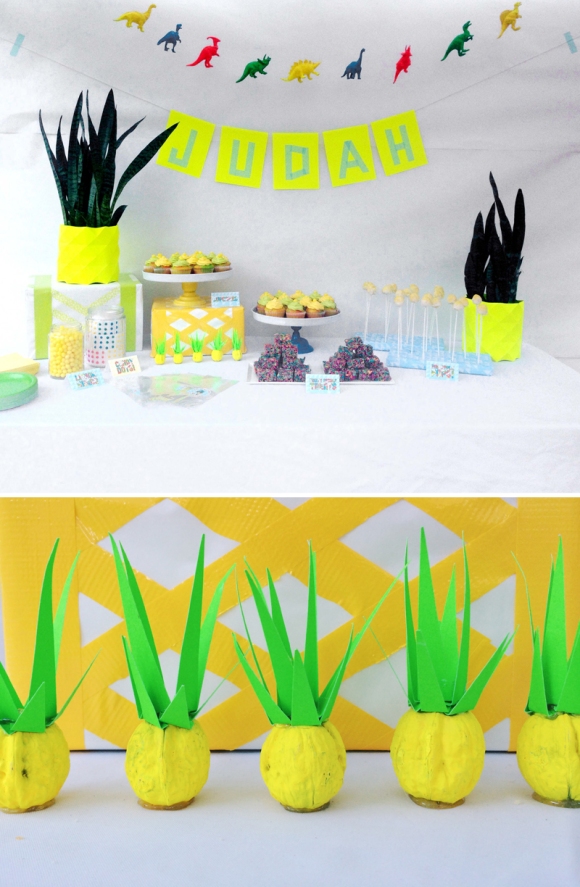
It was the middle of August and it was hot! I wanted a refreshingly fun and bright birthday party, and what is more refreshing than fresh pineapple? I focused on pineapples and bright, hyper-colors for decoration. I folded neon yellow poster paper into a geometric triangle pattern and wrapped it around my sansevieria plants to look like giant pineapples on the dessert table. I collected walnuts and sprayed them neon yellow and hot-glued green spikes to the top as mini-pineapples to line the table with. And I wrapped the dinner table with white butcher paper and plunked neon sharpees into mason jars so the kids could color all over the table and make a bright, fun mess. :)

I served a hawaiian inspired meal to all our friends, using pineapple as a main ingredient. For dessert, I had a candy bar with neon candy dots and lemon heads. I made tie-dye cupcakes, bright krispy treats made out of fruity pebbles, and I scooped fresh pineapple with a melon baller and dipped them like cake-pops into melted candy coating.

I found a ton of neon goodies at the dollar store. Neon play-doh, neon water balloons… So I set up a play-doh station for the kids and we had a giant water balloon battle between the grown-ups and the kids at the end of the party. Keeping cool with a water balloon fight in the August heat will definitely become a birthday tradition!!

eyeheartprettythings-pineapple-birthday-3eyeheartprettythings-pineapple-birthday-2

Follow me on instagram + twitter for more DIY projects & inspiration!

Tagged , , , , , ,

Classic DIY Black+White Pumpkins

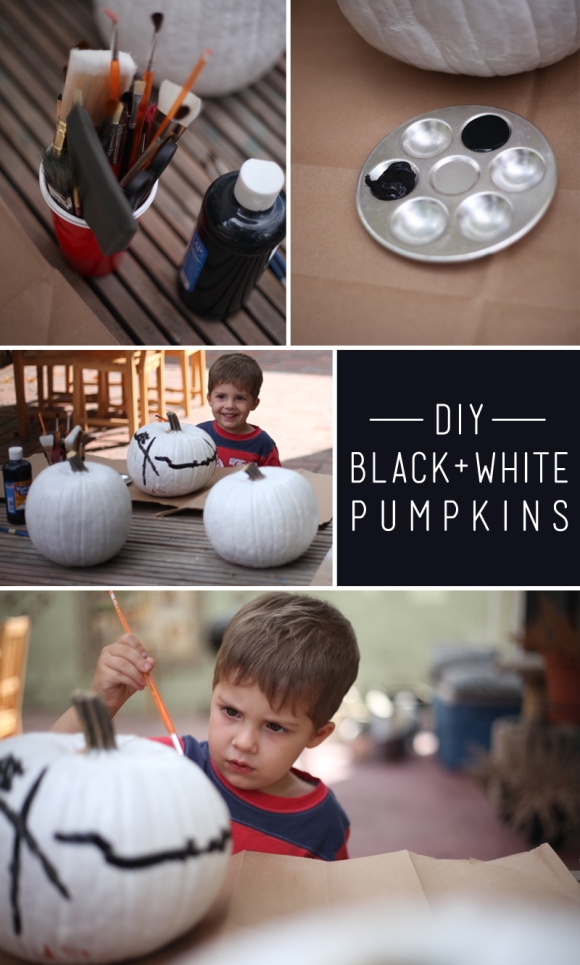
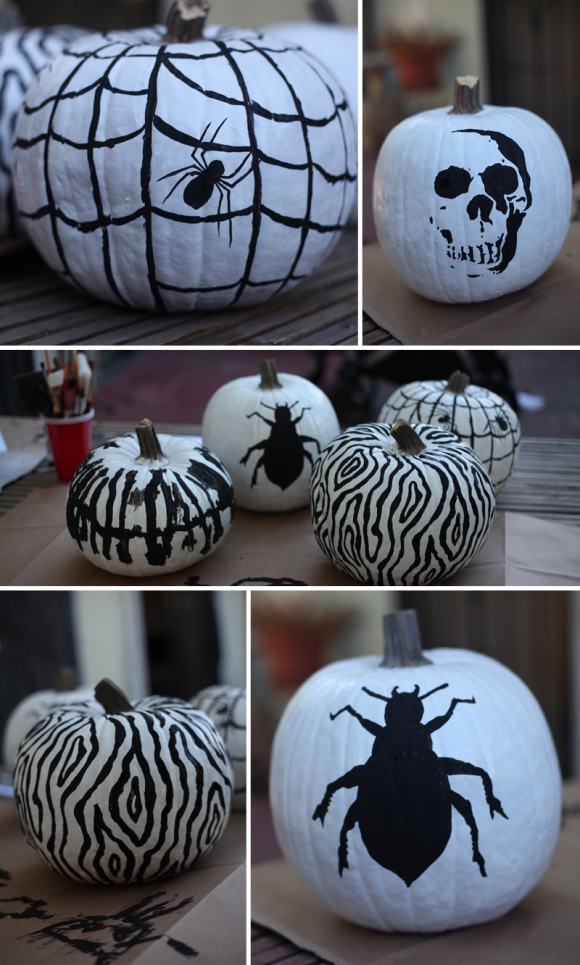
It’s that time of year again, one of my favorite seasons….Fall :) I love layering scarves and boots and sweaters, and I especially love the family traditions that come along with Fall. The pumpkin patch hunting, corn mazes, sweet treats and family gatherings. Last year I set up a little DIY pumpkin painting day with my oldest son. We picked classic black + white. I spray painted each pumpkin white and then we used black poster paint to brush on the designs. My little guy painted a spiderweb, and the other pumpkins I hand painted. I did a beetle, a skull, web + spiders, and a fun little swirly tree bark inspired design. Looking forward to planning another little pumpkin painting party again this year :)

eyeheartprettythings-halloween-blackwhite-pumpkins-diy

Look at the concentration on his face :)

eyeheartprettythings-halloween-blackwhite-pumpkins-diy-2 Happy painting! XO Kiira Photography: Amy Stone Paint: Michael’s Pumpkins: local pumpkin patch Follow me on instagram + twitter for more DIY projects & inspiration!

Tagged , , , ,

DIY Wooden Geometric Centerpieces

Image

I needed a quick and inexpensive solution to fill space on my long thanksgiving table. I saw this idea on instagram by Lay Baby Lay and it is SO easy. I made 4 of these geometric boards for literally under $10, and popped some votives on top and there you have it…centerpieces!

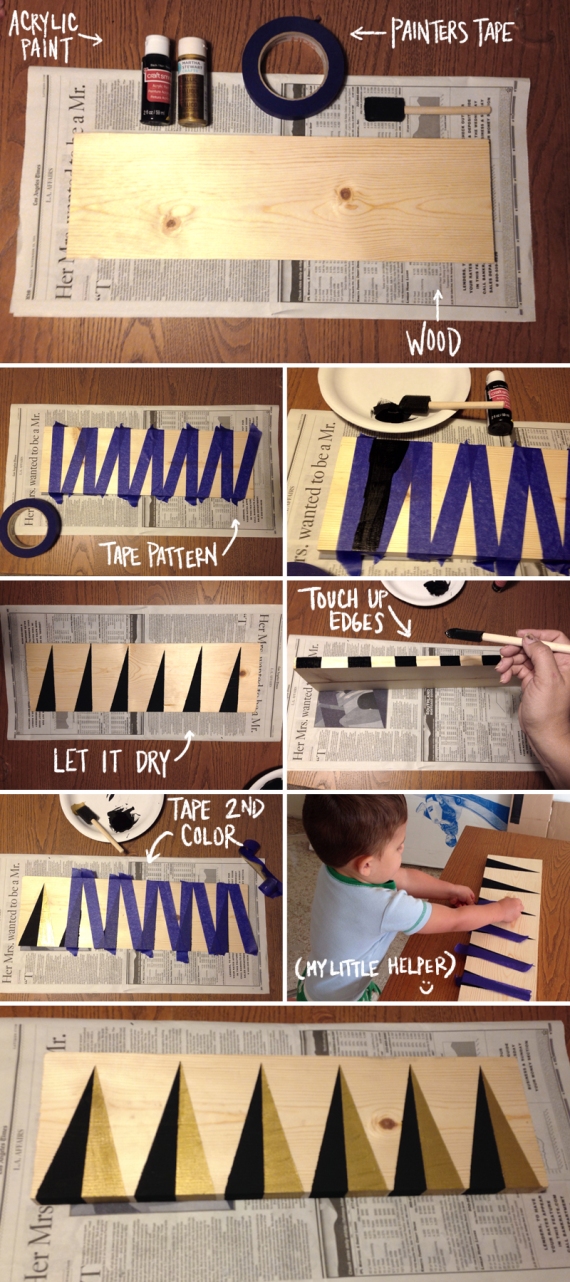
Go to the lumber section at home depot or any hardware store, and find a long piece of unfinished wood (I believe mine was about 8″x64″). The cheap stuff, mine was under $4 for the whole piece of wood. Have them cut it into 4 even pieces. At your local craft store (I went to Michael’s) buy some painters tape, acrylic paint (black and gold), and a foam brush. Below I’ve tried to show each step with photos. It was late at night and I had my 2 year old helping, so my apologies for the poor quality of photos :)

Here’s a quick rundown:

Tape your triangles across the board. I didn’t measure them out, I kinda winged it and just eyeballed the triangles to make them look about the same size and distance. Paint your first color (black) and let it dry. Then peel the tape off. When it’s completely dry, tape off the second triangle for the opposite side. Paint your second color (gold metallic) and let it dry. Peel off the tape, let it dry completely, and finito!

Image

XO
Kiira

Follow me on instagram + twitter for more party ideas & DIY projects!

Tagged , , , , ,

DIY Geometric Table runner

eyeheartprettythings-diy-party-potato-stamp-paper

I needed a quick solution to cover two long six foot tables for a party recently. I bought a giant roll of brown builders paper for only $11 at Home Depot (so cheap!!). I laid it on the tables and used masking tape to wrap the paper around the edges. I’ve been dying to try potato stamping for awhile now, so I went out and got a big russet potato and some black paint. I cut the potato in half, and then cut a triangle shape into it. You could do this with circles, squares, or a variety of shapes (depending on how talented you are at carving :)

Here’s a quick video I made on instagram showing the process.

XO
Kiira

Follow me on instagram + twitter for more party ideas & DIY projects!

Tagged , ,

DIY Baby Shower String Monogram

eyeheartprettythings-diy-babyshower-monogram-yarn-string-craft-3

I first saw this idea over at Green Wedding Shoes and I fell in love with it. I stored it away in the back of my mind for the future and this baby shower was the perfect place for it.

This DIY is so easy and super affordable. My friend Amy and I knocked it out in about 30 minutes. Each ball of yarn was under $3, and the wood was only $7. I think in total we spent under $20 to make it.

Supplies:
– Piece of wood (you could use reclaimed wood or brand new from the hardware store)
– Paper to trace letters
– Ruler
– Xacto blade (or scissors)
– Nails (we used medium sized nails)
– Yarn

We found the wood at a hardware store and they cut it to size for us. I used plain white paper to trace out the letters, cut them out and hammer the nails around the border of the paper to create our outlines.

eyeheartprettythings-diy-babyshower-monogram-yarn-string-craft-1

Once you’ve got your outlines, take your yarn and begin wrapping around the nails, in whatever pattern you like. You could do horizontal lines, vertical lines, or geometric shapes like we did. Keep wrapping your yarn until you’ve filled the space between the board and the head of the nail. This gives you a deep dimensional look and makes the colors really pop off the board.

eyeheartprettythings-diy-babyshower-monogram-yarn-string-craft-2

I had some leftover wood and yarn so I created a heart shaped one as an extra accent piece.

eyeheartprettythings-diy-babyshower-monogram-yarn-string-heart-4

There is so much possibility with this DIY. You could create any shape you can think of (as long as you can make it with nails!) Perfect for hanging in a nursery, living room, kitchen or even to give as a gift. Nothing beats a thoughtful hand crafted gift. I’ll be making many more of these in the future! :)

Happy crafting!
XO
Kiira

Credits:
Photography: Amy Stone
Wood & Nails: Home Depot
Colored yarn: JoAnn’s Fabrics

Tagged , , , , ,

Simple, affordable DIY Succulent centerpieces

View More: http://amystonephoto.pass.us/marshallbabyshower

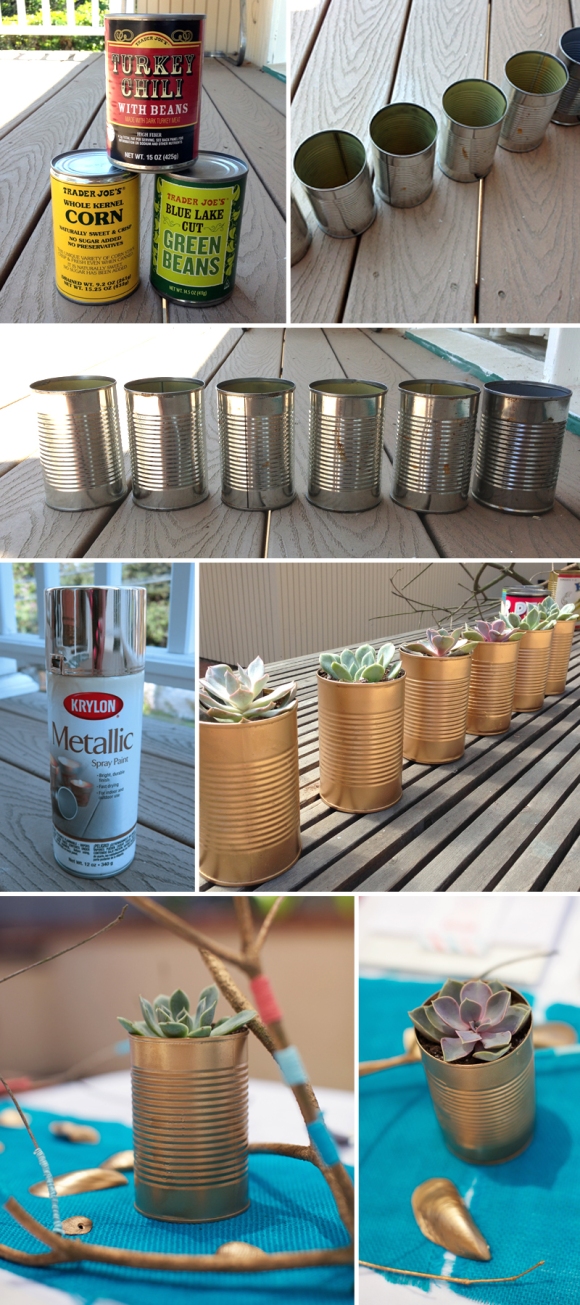
I wanted a simple and affordable solution for filling extra table space at a baby shower I was styling with my good friend and photographer Amy Stone. The colors were peach and turquoise, with hints of gold metallic. I had tons of old canned vegetable cans stored up, so I sprayed them metallic gold and planted miniature succulents in them as centerpieces. Super easy & super affordable. The spray paint was under $5 and the cans were leftover from my pantry food. The succulents were free since I clipped them from plants in my garden and re-planted them into dirt in the cans, but you could always head to your local nursery to pick some up or even Ikea sells mini succulents for $2.99!

Enjoy and happy planting!! :)
XO
Kiira

eyeheartprettythings-diy-succulent-gold-cans

To see more of my DIY, follow me on instagram + twitter!

Tagged , , , , , , , ,

Summer Farmer’s Market DIY

For most of the DIY’s for this party, I used brown craft paper, or recycled brown paper grocery bags (Trader Joe’s rocks!) I drew out a rough pattern to make teeny-tiny paper bags to hold chips. I rolled the paper to make popcorn cones. I folded the paper into little pouches (I’m an origami master at this point, lol) to hold the napkins & silverware, and tied them with blue baker’s twine. Pinking shears are a girls best friend, so I clipped the edges on all my bags & signs to give them a handmade but finished look. I used the leftover scraps of brown paper to fold little flags over wooden skewers (kabab sticks found in the cookware section of your grocery store!) to be my food signs. Then I hand lettered the words with a white gel pen, which I found at an office supply store.

eyeheartprettythings+diy+farmersmarket+gingham+napkin+flags

A super cute accent to any party is a string of bunting flags. I had an old gardening calendar that had wonderful fruit & vegetable graphics. I used it to cut simple triangle flags, folded the top, and stapled them over a string of white twine to make my farmer’s market bunting flags. I traced and cut out the letters J U D A H and pasted them on to personalize the flags.

eyeheartprettythings+diy+farmersmarket+bunting+flags

For the party invitations, I wanted a bright yet faded look, reminiscent of a vintage paint can or food label. I designed and printed them myself, and I found brown kraft paper envelopes at Paper Source. I printed and cut out the red gingham liners myself using a template I traced from the envelope shape.

eyeheartprettythings+diy+farmersmarket+invitation+birthday

To see more DIY projects and design inspiration, check me out on instagram + twitter!

Bottle obsession

eyeheartprettythings+rainbow+pretty+coloredbottles+decor+house

Every time I drive past a yard sale, I can’t help myself. I love collecting people’s old neglected pretty things. My colored glass bottle collection has grown over the years and it’s almost too large to span my bookshelf anymore. But I can’t stop myself. :)

I was super excited today to unpack them and set them up in my new house. I’ll be posting more photos of the house in the coming weeks as everything gets squared away and boxes are unpacked. For more unofficial glimpses into my world, follow me on instagram + twitter!