Tag Archives: entertaining

Happy Thanksgiving | Dinner Party

I paired up with my good friend Jessica Burns this week to create a delicious pre-thanksgiving dinner party for all of our friends before the real Thanksgiving, which we all spend with our families. This was my first time hosting a Thanksgiving style meal at my house, turkey… ham… stuffing… So I was definitely intimidated by the task, until I observed the grace and talent that Jessica has when preparing for an event :)

Jess and I settled on a rustic autumn theme, and I started by designing these invitations (yes! actual paper invitations that I mailed with a stamp, no evite this year!) I also created custom paper envelope liners and little details to match throughout the entire party.
eyeheartprettythings-thanksgiving-1

We took an old steamer trunk and lined it with burlap as our drink station. I wrapped rustic mason jars with hemp twine and patterned paper liners that I designed and printed from my home printer. I found my favorite paper straws in gray and white stripes and I created little flags for each one.

eyeheartprettythings-thanksgiving-2

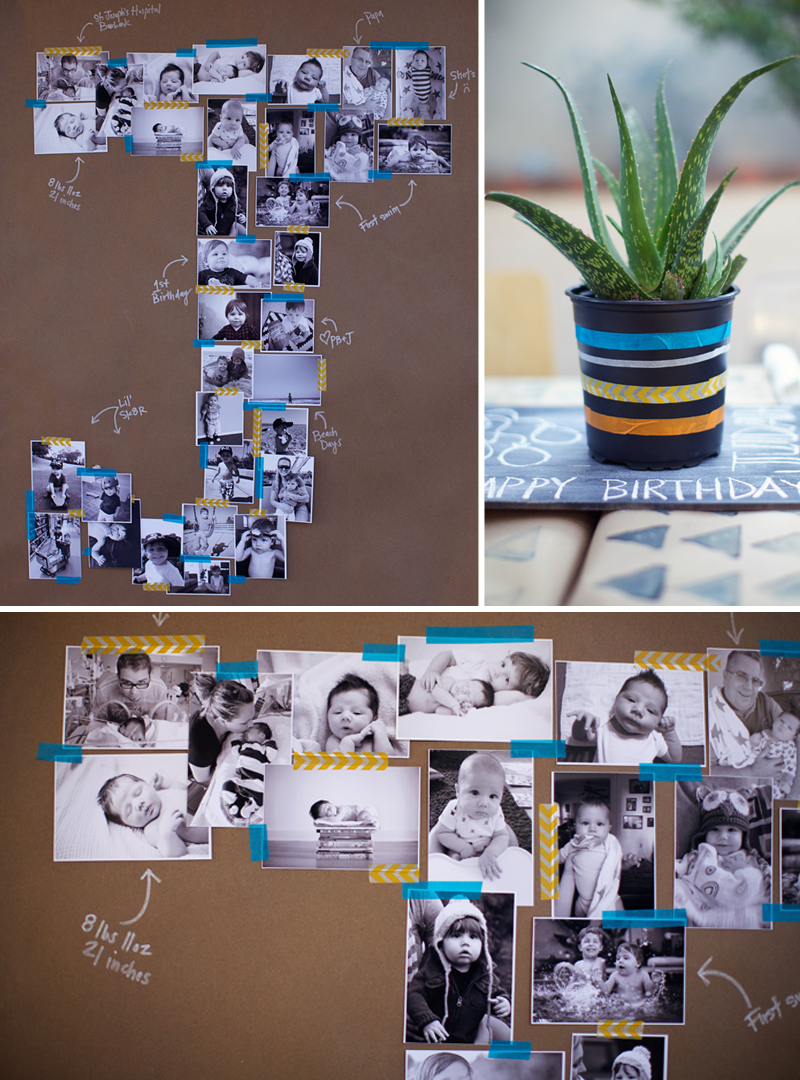
For the table we used a simple white tablecloth with a burlap runner and autumn colored pomegranates, crab apples, pears and persimmons that we picked up from the local produce market. I love the simplicity of the green and white floral arrangements that Jessica created in the mercury glass vases. For each place setting I created mini chalkboards with each guests name written on them. I cut small pieces of wood into squares and bought chalkboard paint at the hardware store. These are such a cute takeaway for your guests, and super easy and cheap to make! Our intent was to have everyone go around the table and draw something that they were thankful for, but we ended up having so much fun that we forgot to do it! :)
eyeheartprettythings-thanksgiving-3

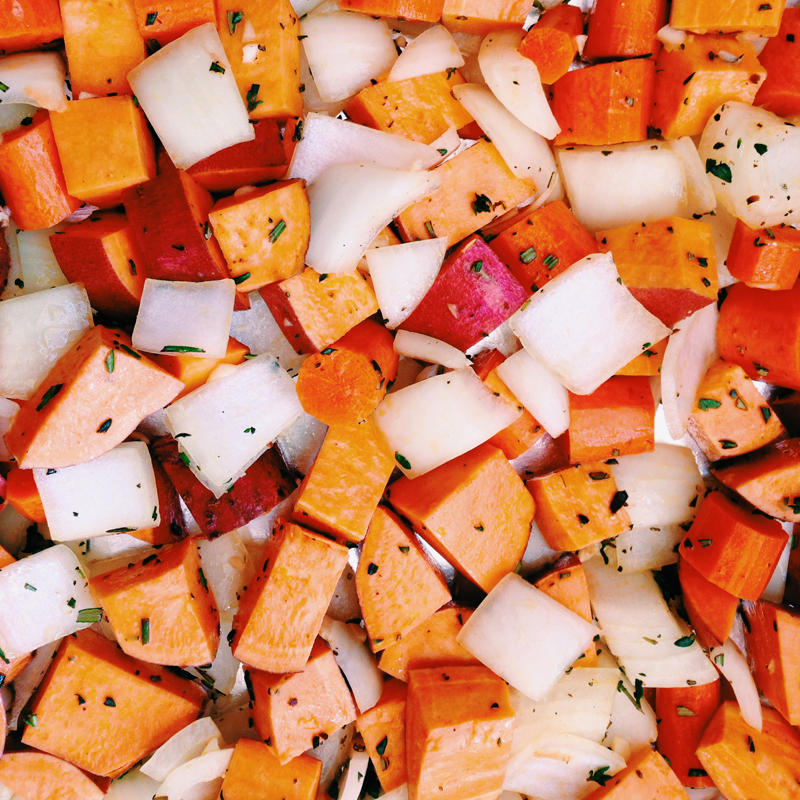
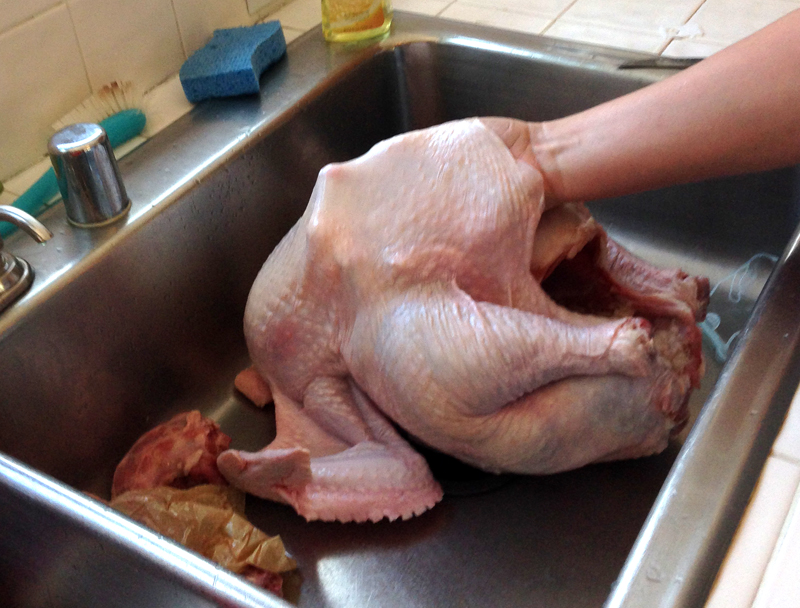
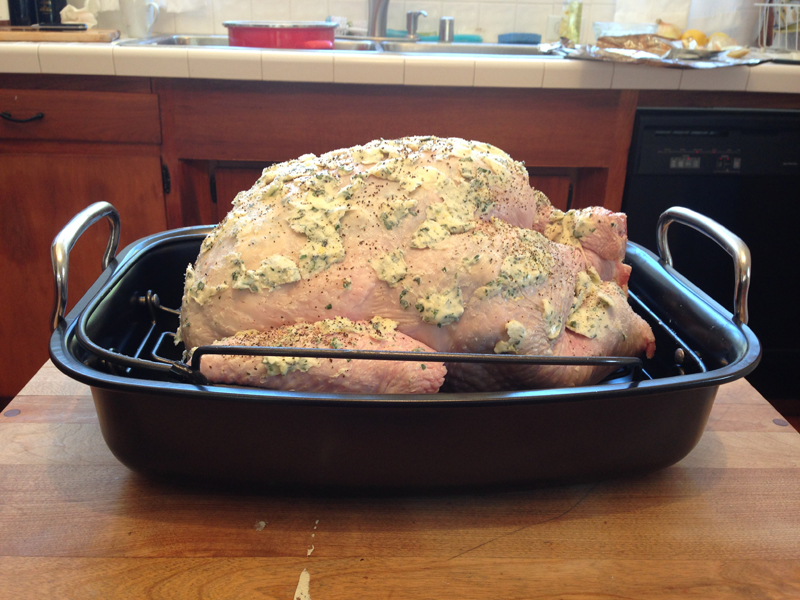
Now for the food… All thanks goes to Jessica for making this delicious meal happen. I can’t say enough how amazing she is in the kitchen! She set up a gorgeous cheese, meat and fruit platter, and I can’t forget to mention her signature Burrata in a jar…yummmm! It was an amazing meal complete with a perfectly golden turkey, ham, roasted root vegetables, celery root stuffing, brown butter mashed potatoes, minted peas and carrots. I’m blown away that it was all done from my quaint little kitchen! I painted a slab of wood with the leftover chalkboard paint to create a double sided chalkboard menu for dinner and dessert. It added rustic charm to the table overflowing with good food.eyeheartprettythings-thanksgiving-4

For dessert Jessica made her Pumpkin Swirl cheesecake squares, I made a Spiced layer cake with molasses cream cheese frosting, and we had, of course, a pumpkin pie. This was such a fun and creative dinner party. Thank you again to Amy of Amy Stone Photography for taking such stunning photos of everything! I am so blessed by the friends that we have surrounding us and cannot wait to do this again! :)eyeheartprettythings-thanksgiving-5

Advertisement
Tagged , , , ,

Pineapple Hyper-color Birthday!

eyeheartprettythings-pineapple-birthday-1

It was the middle of August and it was hot! I wanted a refreshingly fun and bright birthday party, and what is more refreshing than fresh pineapple? I focused on pineapples and bright, hyper-colors for decoration. I folded neon yellow poster paper into a geometric triangle pattern and wrapped it around my sansevieria plants to look like giant pineapples on the dessert table. I collected walnuts and sprayed them neon yellow and hot-glued green spikes to the top as mini-pineapples to line the table with. And I wrapped the dinner table with white butcher paper and plunked neon sharpees into mason jars so the kids could color all over the table and make a bright, fun mess. :)

I served a hawaiian inspired meal to all our friends, using pineapple as a main ingredient. For dessert, I had a candy bar with neon candy dots and lemon heads. I made tie-dye cupcakes, bright krispy treats made out of fruity pebbles, and I scooped fresh pineapple with a melon baller and dipped them like cake-pops into melted candy coating.

I found a ton of neon goodies at the dollar store. Neon play-doh, neon water balloons… So I set up a play-doh station for the kids and we had a giant water balloon battle between the grown-ups and the kids at the end of the party. Keeping cool with a water balloon fight in the August heat will definitely become a birthday tradition!!

eyeheartprettythings-pineapple-birthday-3eyeheartprettythings-pineapple-birthday-2

Follow me on instagram + twitter for more DIY projects & inspiration!

Tagged , , , , , ,

Black + White Chalkboard Birthday BBQ

This party was a bit of a last minute idea born out of a can of chalkboard paint and a large piece of wood. My son’s birthday was quickly approaching, and I knew that I wanted to do a southern style bbq, but since it was mostly our adult friends, I wasn’t sure what style I should go with. I wanted something classic, simple but dramatic, with a lot of personal details and photos of my son’s first two years.

I went with black and white, it’s the two colors that always go well together. I painted a large piece of wood with black chalkboard paint as the table backdrop, and I printed a garland of black and white photos as a timeline of my little guy’s life from birth through 2 years. Instead of tablecloths, I lined the tables with brown builder’s paper, and used a sliced potato to stamp a triangle pattern on it. Check out the DIY here. As table runners, I glued paint sticks together and painted them with the same chalkboard paint. I wrote fun little messages along the table runners, drawings of balloons, stars, birthday cake.

This was a quick and easy party concept to execute. It would work for an anniversary party, adult birthday, or even just a classic barbecue. Enjoy!

eyeheartprettythings-chalkboard-birthday-party-tableeyeheartprettythings-chalkboard-birthday-party-invitationeyeheartprettythings-chalkboard-birthday-party-photocollageeyeheartprettythings-birthday-party-chalkboard-drinkseyeheartprettythings-chalkboard-birthday-party-food

Photos by Amy Stone

Tagged , , , , ,

Strawberry Ice Cream Sandwiches

eyeheartprettythings-strawberry-ice-cream-sandwich

I made these strawberry ice cream sandwiches for a baby shower I hosted recently. I’m not a big chocolate lover (in fact, I hate chocolate) so I adapted this recipe to be non-chocolate and full of color.

Ingredients:
1/2 cup butter
1/3 cup brown sugar
1/4 cup granulated sugar
2 tbs milk
1/2 tsp vanilla extrat
1/4 tsp salt
1 1/4 cups flour
1/2 cup colored sprinkles
1 quart strawberry ice cream
Nonstick cooking spray

In a microwave safe bowl, melt together butter with brown sugar and granulated sugar.
Stir in the vanilla, salt and milk. Stir in the flour until smooth.

Line a large cookie sheet (or jelly roll pan) with parchment paper, extending past the edges. (this is so you can lift the flattened dough out once it’s frozen). Spray the parchment paper with nonstick spray. Press the dough into the pan on the parchment paper. Smooth it out to be as flat as you can, then sprinkle with colored sprinkles (the more the merrier!) Freeze for at least an hour. Meanwhile, take your strawberry ice cream out to get softened so it’s easier to spread.

After an hour, remove the frozen cookie dough. Cut it down the middle to create two large rectangles of cookie dough. Lift one of them out of the pan. Flip the other one around so the sprinkles face down on the parchment paper. Spread the softened ice cream on top in an even layer. Place second cookie dough layer on top, with sprinkles side up. Put back in the freezer for about an hour. Remove and slice into squares.

Tip: to keep the sandwiches from sticking when I stacked them, I cut long strips of parchment paper to wrap them up in.

eyeheartprettythings-strawberry-icecream-sandwich-diy

Follow me on instagram + twitter for more creative ideas & DIY projects!

Tagged , , , , ,

DIY Wooden Geometric Centerpieces

Image

I needed a quick and inexpensive solution to fill space on my long thanksgiving table. I saw this idea on instagram by Lay Baby Lay and it is SO easy. I made 4 of these geometric boards for literally under $10, and popped some votives on top and there you have it…centerpieces!

Go to the lumber section at home depot or any hardware store, and find a long piece of unfinished wood (I believe mine was about 8″x64″). The cheap stuff, mine was under $4 for the whole piece of wood. Have them cut it into 4 even pieces. At your local craft store (I went to Michael’s) buy some painters tape, acrylic paint (black and gold), and a foam brush. Below I’ve tried to show each step with photos. It was late at night and I had my 2 year old helping, so my apologies for the poor quality of photos :)

Here’s a quick rundown:

Tape your triangles across the board. I didn’t measure them out, I kinda winged it and just eyeballed the triangles to make them look about the same size and distance. Paint your first color (black) and let it dry. Then peel the tape off. When it’s completely dry, tape off the second triangle for the opposite side. Paint your second color (gold metallic) and let it dry. Peel off the tape, let it dry completely, and finito!

Image

XO
Kiira

Follow me on instagram + twitter for more party ideas & DIY projects!

Tagged , , , , ,

My First Hosted Thanksgiving

This year was my first time hosting Thanksgiving in my own home. I was excited and nervous, but mostly nervous about timing the food and wrangling my kids + 20 family members. Due to that fact, I didn’t get to capture many photos as I’d have liked, besides a few on instagram, so my apologies for the crappy imagery. A little recap to follow…

Prepping everything the night beforeImage

Root vegetables ready for roasting…Image

This party is simply lovely, stretching out the skin of the turkey to make lots of room for BUTTER!Image

Yes…that is all butter and herbs…Image

Roasted turkey fresh out of the oven…see the steam rising? #nomnomImage

Snacks before dinner…cheese from Trader Joe’s, fruit & charcuterieImage

Me (hi!) carving the turkey the way I learned on YouTube ;)Image

Table for the adults! (kiddie’s not shown)Image

And we’re done! Special note to the amaze-balls Sausage + Celery root stuffing recipe borrowed from the beautiful Jessica Burns!

Image

XO

Follow me on instagram + twitter for more party ideas & DIY projects!

Tagged , , , , , , ,

DIY Geometric Table runner

eyeheartprettythings-diy-party-potato-stamp-paper

I needed a quick solution to cover two long six foot tables for a party recently. I bought a giant roll of brown builders paper for only $11 at Home Depot (so cheap!!). I laid it on the tables and used masking tape to wrap the paper around the edges. I’ve been dying to try potato stamping for awhile now, so I went out and got a big russet potato and some black paint. I cut the potato in half, and then cut a triangle shape into it. You could do this with circles, squares, or a variety of shapes (depending on how talented you are at carving :)

Here’s a quick video I made on instagram showing the process.

XO
Kiira

Follow me on instagram + twitter for more party ideas & DIY projects!

Tagged , ,

Watercolor Baby Shower

This baby shower was very near and dear to my heart because it was for my closest friend Amy. Amy and I both love beautiful details, so I wanted to make this a very special party to celebrate their soon-to-arrive baby Hayley. This was a very DIY baby shower brunch. I was on a tight budget, so I was determined to hand-make everything that I could.

I took my inspiration from some vintage italian watercolored crepe paper party decorations that I found on Etsy. I became obsessed with finding some, but since they were vintage and seemingly one of a kind, I decided to create my own. I ordered white crepe paper balls online and used watercolors to delicately hand-paint them to match my palette. The styling of the baby shower slowly evolved into a vintage watercolor-esque affair. I found some inexpensive textile fabrics in varying patterns that fit nicely into my palette, and I tore them into strips and tied them to a string to create a backdrop for the buffet table. The paint chip garland was an easy and very cheap piece of decoration. I used a scalloped hole punch to create circles from paint swatches I picked up (for free!) at a hardware store. I glued them back-to-back with a string in between. The extra paint chips were scattered around the floral centerpieces to add some color to the white tablecloths.

I created a few chalkboard signs with plywood and chalkboard paint that I picked up from the local hardware store. That chalkboard paint is one of my new favorite craft supplies! I also used a wooden sign and two wooden jewelry boxes which I found at the craft store for under $5 to glue together a long white cake stand. I created little watercolor flags and small colored water balloons filled with air for the sign on the cake.

All of the food was homemade by myself and a few of our close friends who helped out, except for the Krispy Kreme donuts of course. I’d been saving baby food jars for months, so we served chocolate milk in the jars adorned with a paper straw and mini donut through the straw. They were a huge hit! On the menu was sausage & egg strata, muffins, a brown-sugar french toast bake, tater tots, mini quiches, cinnamon rolls and fresh fruit. For our beverage table, a “bubbly bar” with champagne, fruit puree and fresh fruit, as well as some non-alcoholic mixers for our preggo guest of honor.

The invitations and all the paper goods I designed and printed myself. Using watercolors, I painted several pages of ombre colors, which I used for all of the backgrounds on the invitations, signs, labels and flags. I used the extra watercolored paper to punch scalloped circles and assemble a watercolor chandelier for baby Hayley’s nursery. For the guest table, I used my grandma’s vintage wooden hutch. I designed “wishes for Hayley” cards for guests to write and clip onto fabric streamers hanging from tree branches. I also created a Meal Train sign up sheet that coordinated with all the paper goods from the party, and guests were able to sign up to bring Amy and Josh meals once Hayley arrived.

Overall, the baby shower was a beautiful event and I greatly treasure having the opportunity to host this for Amy.


If anyone is interested in some of the crafts, DIY Tutorials are up on my blog:
Long Pastel layered cake
Watercolor Chandelier
Painted Onesies
Watercolor Party Decor + Paper goods
Paint Chip Garland
Baby Food jars for Donuts (how to get the sticky gunk off! :)

Credits:
Party planning + decor: eyeheartprettythings
Flower arrangements: Jessica Burns
Photography: Amy Stone Photography
Paper goods + Invitations: eyeheartprettythings
Donuts: Krispy Kreme
Craft supplies: Michael’s and Home Depot
Food: eyeheartprettythings , Jessica and friends

Tagged , , , , , , , , , , ,

Pastel Layered Cake

Baking and assembling this cake took me the entire evening before the baby shower until the wee hours of the morning. I wanted a long, layered cake that would surprise everyone with beautiful pastel colors when it was sliced. I used 3 boxes of white cake mix and divided the batch into 6 separate bowls. I added a tiny amount of food coloring to each bowl, and spread each batch onto a jelly roll pan in order to get the long, thin layers. I baked them much less than the recommended bake time, because the layers are so thin. I kept a close eye on each batch to make sure they didn’t burn.

Once the cake was baked, I used a cardboard cake board that I found at Michael’s and cut it into a long rectangle. I used this to slice around to make sure each layer was the same exact size. Then I used the same cake board as the base, so that I would be able to transport the cake without it bending. I layered each color with a thick buttercream frosting, using extra frosting in the shallow areas to make the layers lay flat.

Overall, the cake was a little bit wonky because it was my first time trying this, but I think it turned out nicely given that I’m no pro baker :)

Tagged , , , , , , , , , , ,

Vintage Watercolor Palette | Summer Baby Shower

Here’s a little peek at a baby shower I’m planning for this summer for one of my best friends. My inspiration began with these amazing 1930’s vintage crepe paper decorations that I found on etsy, which I’m going to re-make with white honeycomb balls and watercolors. I’m so excited about this one! More to come as the planning continues :)

1. Left top via Pinterest (I wish I could find the original source for this one, it’s beautiful!)
2. Left middle via Etsy
3. Left bottom via Etsy
4. Top right via Traci Thorson Photography
5. Right 2nd down via Design*Sponge
6. Right 3rd down via Love my Dress
7. Right 4th down via Green Wedding Shoes
8. Right bottom via Etsy

Tagged , , ,
%d bloggers like this: