Tag Archives: diy

DIY Edamame jelly beans

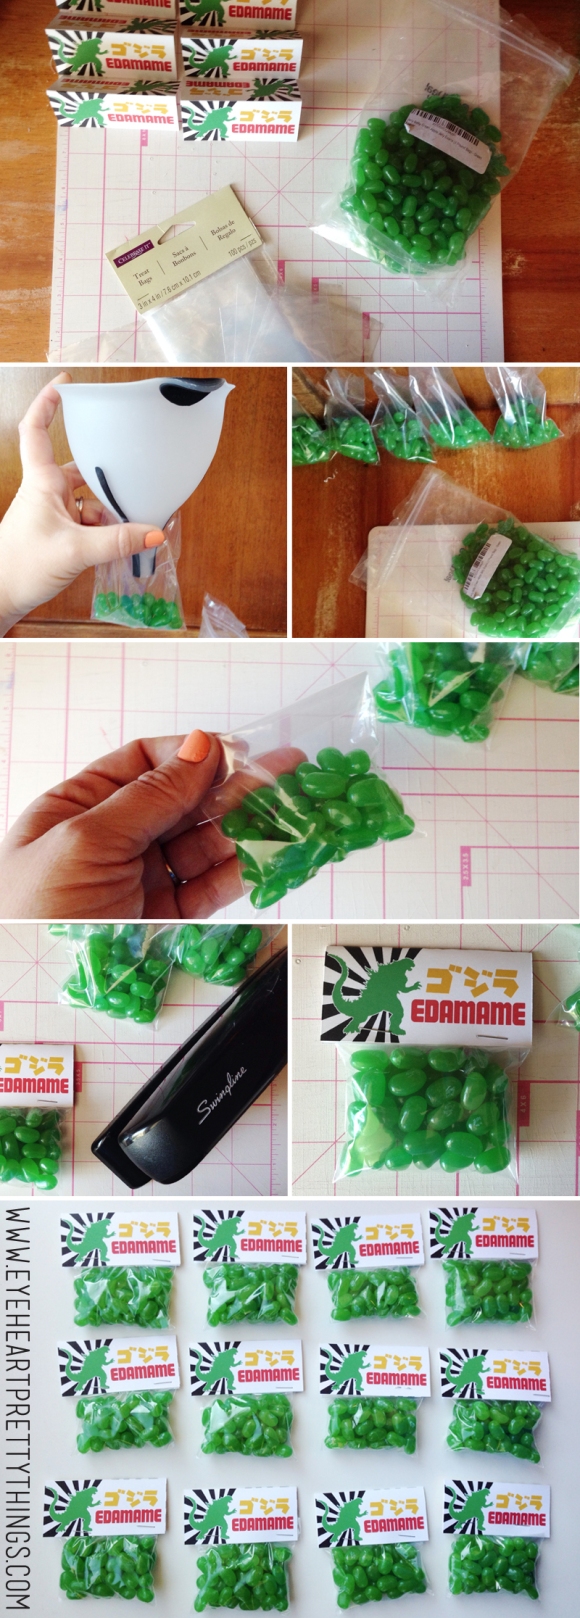
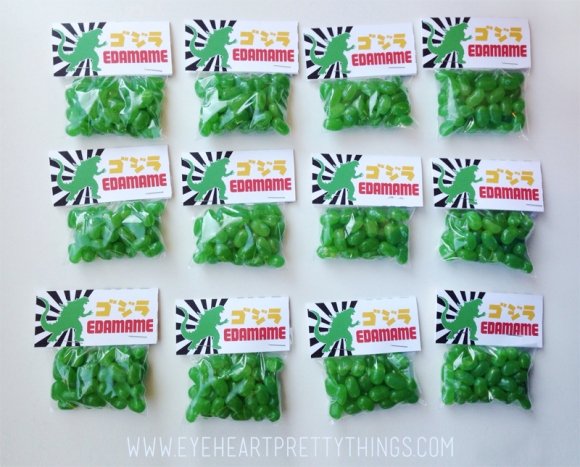
How cute are these little “edamame” jelly bean pouches?
eyeheartprettythings-ninja-birthday-edamame-diy
This was such an easy DIY. All you need is a pound of green jelly bellies, some glassine treat bags (which I bought at Michael’s crafts), a printer and a stapler.
eyeheartprettythings-ninja-birthday-edamame-diy-favor
If you have a funnel, it makes getting the beans into the bags easier. I tried one without and ended up with 1 jelly bean in the bag and the rest all over the table. I designed and printed the labels on card stock, cut and folded them over and stapled them onto the bag, sealing in the jelly beans. Super simple!! I’ll be selling these printables soon, so email me at eyeheartprettythings@gmail.com if you’re planning a party and need some design work done! :)

Follow me on instagram + twitter for more creative ideas & DIY projects!

Tagged , , , , , , ,

Classic DIY Black+White Pumpkins

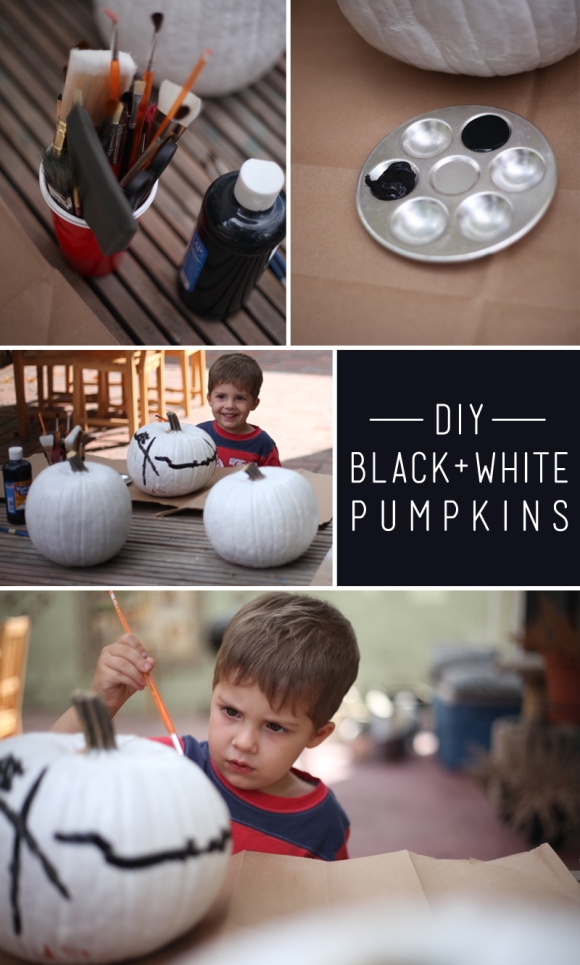
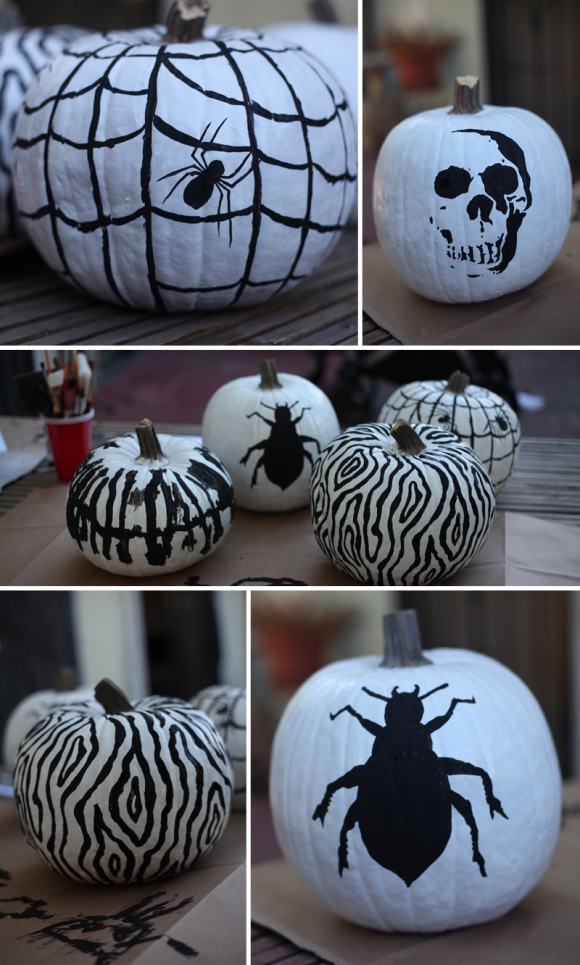
It’s that time of year again, one of my favorite seasons….Fall :) I love layering scarves and boots and sweaters, and I especially love the family traditions that come along with Fall. The pumpkin patch hunting, corn mazes, sweet treats and family gatherings. Last year I set up a little DIY pumpkin painting day with my oldest son. We picked classic black + white. I spray painted each pumpkin white and then we used black poster paint to brush on the designs. My little guy painted a spiderweb, and the other pumpkins I hand painted. I did a beetle, a skull, web + spiders, and a fun little swirly tree bark inspired design. Looking forward to planning another little pumpkin painting party again this year :)

eyeheartprettythings-halloween-blackwhite-pumpkins-diy

Look at the concentration on his face :)

eyeheartprettythings-halloween-blackwhite-pumpkins-diy-2 Happy painting! XO Kiira Photography: Amy Stone Paint: Michael’s Pumpkins: local pumpkin patch Follow me on instagram + twitter for more DIY projects & inspiration!

Tagged , , , ,

DIY Gift Wrapping ideas

I teamed up with the wonderful Friedia Niimura to show you some creative and easy ways to wrap your gifts this holiday season. Check out the video and be sure to follow me on bloglovin for more fun ideas!!

XO
Kiira

Follow me on instagram + twitter for more creative ideas & DIY projects!

Tagged , , , , , , ,

DIY Wooden Geometric Centerpieces

Image

I needed a quick and inexpensive solution to fill space on my long thanksgiving table. I saw this idea on instagram by Lay Baby Lay and it is SO easy. I made 4 of these geometric boards for literally under $10, and popped some votives on top and there you have it…centerpieces!

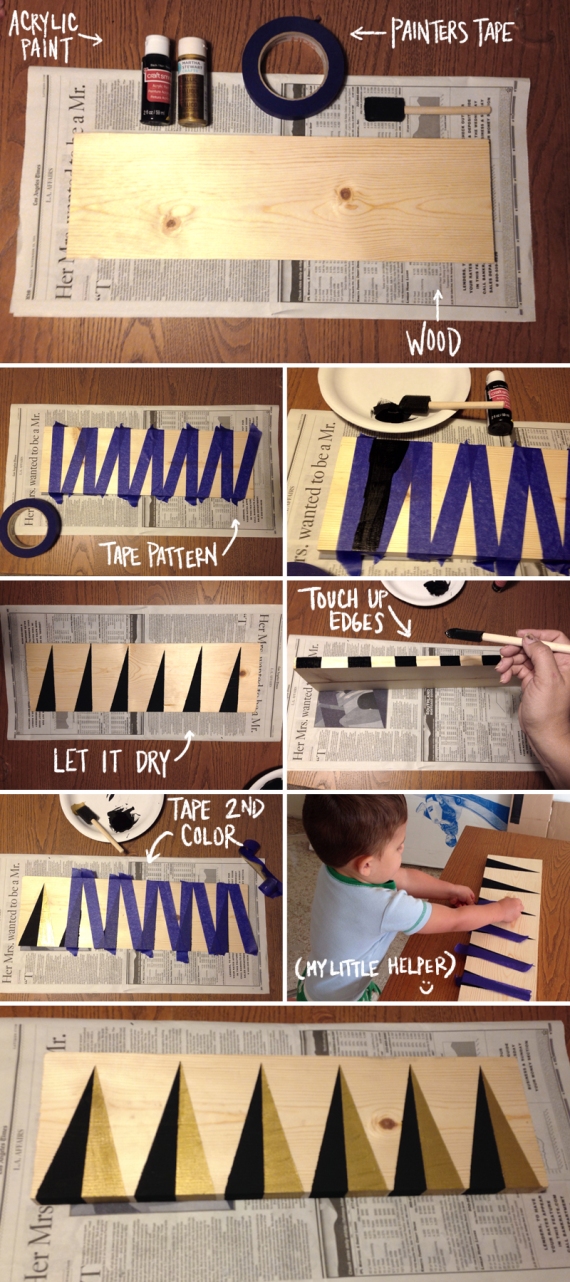
Go to the lumber section at home depot or any hardware store, and find a long piece of unfinished wood (I believe mine was about 8″x64″). The cheap stuff, mine was under $4 for the whole piece of wood. Have them cut it into 4 even pieces. At your local craft store (I went to Michael’s) buy some painters tape, acrylic paint (black and gold), and a foam brush. Below I’ve tried to show each step with photos. It was late at night and I had my 2 year old helping, so my apologies for the poor quality of photos :)

Here’s a quick rundown:

Tape your triangles across the board. I didn’t measure them out, I kinda winged it and just eyeballed the triangles to make them look about the same size and distance. Paint your first color (black) and let it dry. Then peel the tape off. When it’s completely dry, tape off the second triangle for the opposite side. Paint your second color (gold metallic) and let it dry. Peel off the tape, let it dry completely, and finito!

Image

XO
Kiira

Follow me on instagram + twitter for more party ideas & DIY projects!

Tagged , , , , ,

DIY Geometric Table runner

eyeheartprettythings-diy-party-potato-stamp-paper

I needed a quick solution to cover two long six foot tables for a party recently. I bought a giant roll of brown builders paper for only $11 at Home Depot (so cheap!!). I laid it on the tables and used masking tape to wrap the paper around the edges. I’ve been dying to try potato stamping for awhile now, so I went out and got a big russet potato and some black paint. I cut the potato in half, and then cut a triangle shape into it. You could do this with circles, squares, or a variety of shapes (depending on how talented you are at carving :)

Here’s a quick video I made on instagram showing the process.

XO
Kiira

Follow me on instagram + twitter for more party ideas & DIY projects!

Tagged , ,

DIY Baby Shower String Monogram

eyeheartprettythings-diy-babyshower-monogram-yarn-string-craft-3

I first saw this idea over at Green Wedding Shoes and I fell in love with it. I stored it away in the back of my mind for the future and this baby shower was the perfect place for it.

This DIY is so easy and super affordable. My friend Amy and I knocked it out in about 30 minutes. Each ball of yarn was under $3, and the wood was only $7. I think in total we spent under $20 to make it.

Supplies:
– Piece of wood (you could use reclaimed wood or brand new from the hardware store)
– Paper to trace letters
– Ruler
– Xacto blade (or scissors)
– Nails (we used medium sized nails)
– Yarn

We found the wood at a hardware store and they cut it to size for us. I used plain white paper to trace out the letters, cut them out and hammer the nails around the border of the paper to create our outlines.

eyeheartprettythings-diy-babyshower-monogram-yarn-string-craft-1

Once you’ve got your outlines, take your yarn and begin wrapping around the nails, in whatever pattern you like. You could do horizontal lines, vertical lines, or geometric shapes like we did. Keep wrapping your yarn until you’ve filled the space between the board and the head of the nail. This gives you a deep dimensional look and makes the colors really pop off the board.

eyeheartprettythings-diy-babyshower-monogram-yarn-string-craft-2

I had some leftover wood and yarn so I created a heart shaped one as an extra accent piece.

eyeheartprettythings-diy-babyshower-monogram-yarn-string-heart-4

There is so much possibility with this DIY. You could create any shape you can think of (as long as you can make it with nails!) Perfect for hanging in a nursery, living room, kitchen or even to give as a gift. Nothing beats a thoughtful hand crafted gift. I’ll be making many more of these in the future! :)

Happy crafting!
XO
Kiira

Credits:
Photography: Amy Stone
Wood & Nails: Home Depot
Colored yarn: JoAnn’s Fabrics

Tagged , , , , ,

Simple, affordable DIY Succulent centerpieces

View More: http://amystonephoto.pass.us/marshallbabyshower

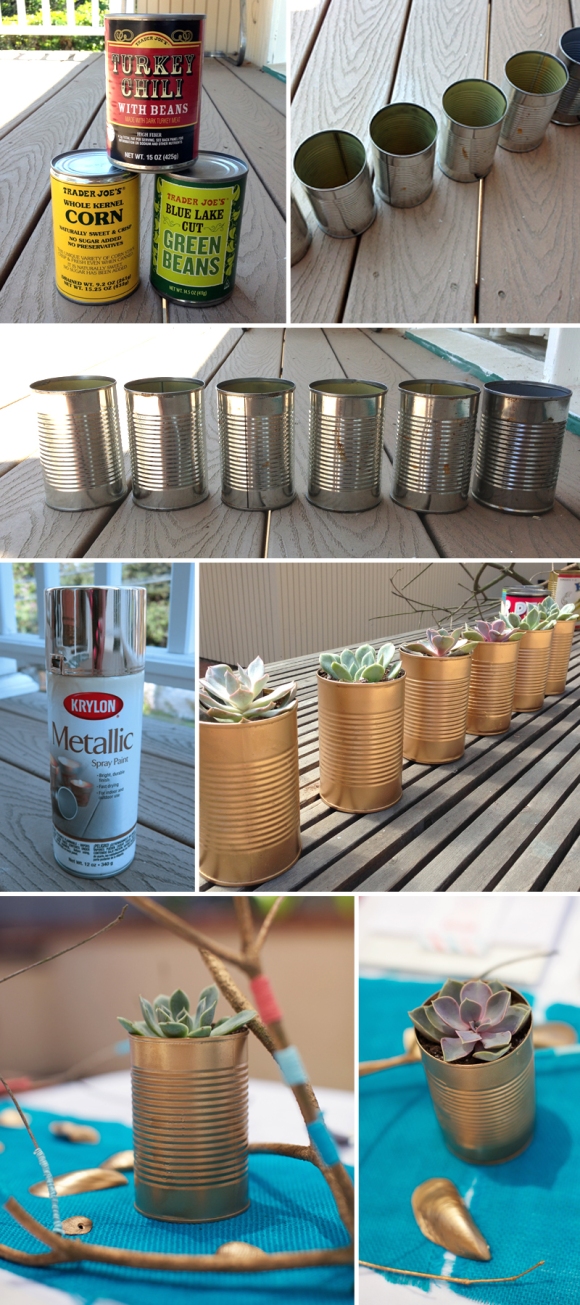
I wanted a simple and affordable solution for filling extra table space at a baby shower I was styling with my good friend and photographer Amy Stone. The colors were peach and turquoise, with hints of gold metallic. I had tons of old canned vegetable cans stored up, so I sprayed them metallic gold and planted miniature succulents in them as centerpieces. Super easy & super affordable. The spray paint was under $5 and the cans were leftover from my pantry food. The succulents were free since I clipped them from plants in my garden and re-planted them into dirt in the cans, but you could always head to your local nursery to pick some up or even Ikea sells mini succulents for $2.99!

Enjoy and happy planting!! :)
XO
Kiira

eyeheartprettythings-diy-succulent-gold-cans

To see more of my DIY, follow me on instagram + twitter!

Tagged , , , , , , , ,

DIY Gold Confetti Stationery

I’ve been going a little gold crazy lately. I bought a can of metallic gold spray paint for a crafty DIY baby shower I’m putting together with my friend Amy. We’ll post more on that in a bit ;) In the meantime, I’ve been finding all sorts of fun things to use metallic gold to accent with. Here I printed a simple black and white greeting card on my inkjet printer. Then created a cardstock stencil using varied hole punch sizes, lined it up on my card, sprayed, and voilà! A beautiful, handmade metallic confetti greeting card! You could do this any way you like, if you don’t have a printer you can handwrite a message or do calligraphy.

eyeheartprettythings-diy-gold-stationery-spraypaint-card-confetti

Supplies:
– White cardstock
– 1 can metallic gold spray paint
– Ruler
– X-acto blade
– Cutting mat (so you don’t cut through onto your floor or table)
– Hole punch
– Hammer

eyeheartprettythings-diy-gold-stationery-spraypaint-card-confetti

First, punch holes in a piece of cardstock in a pattern or design you like. I wanted mine to look like scattered pieces of confetti falling. I used two different sizes of hole punches that you hammer to punch through the paper. They come as a set at Michael’s craft store. Once you have your design, lay it flat onto a second piece of cardstock and do a test spray with your metallic spraypaint. It’s best if you can hold your stencil very tight so the spray can’t sneak under it. Once you’re ready, print (or write) on your greeting card. Then place it under the stecil, hold tight, and spray. When the paint has dried, cut along the measured lines with your x-acto blade on your cutting mat (I created a 5×7″ flat card). I used a metallic gold pen to address the envelope to tie them together :) Enjoy!

XO
Kiira

To see more DIY projects, check me out on instagram + twitter!

Tagged , , , , , ,

DIY Bow Ties for Easter!

I came across an amazing tutorial on how to easily make a bow tie on prudentbaby.com. My close friend Amy and I became obsessed with making them for an Easter photoshoot with my boys, so we immediately drove to Michael Levine in downtown LA to find as much cute fabric as we could. Then we dragged my ancient sewing machine from the back of my garage, buried under Christmas decorations and bins of baby clothes, and made these little guys. I’m in love! I think the plaid one is my absolute favorite :)

eyeheartprettythings+bowties+diy


Check out the tutorial and very helpful step-by-step instructions over at prudent baby.


Tagged , , , , , ,

Watercolor Baby Shower

This baby shower was very near and dear to my heart because it was for my closest friend Amy. Amy and I both love beautiful details, so I wanted to make this a very special party to celebrate their soon-to-arrive baby Hayley. This was a very DIY baby shower brunch. I was on a tight budget, so I was determined to hand-make everything that I could.

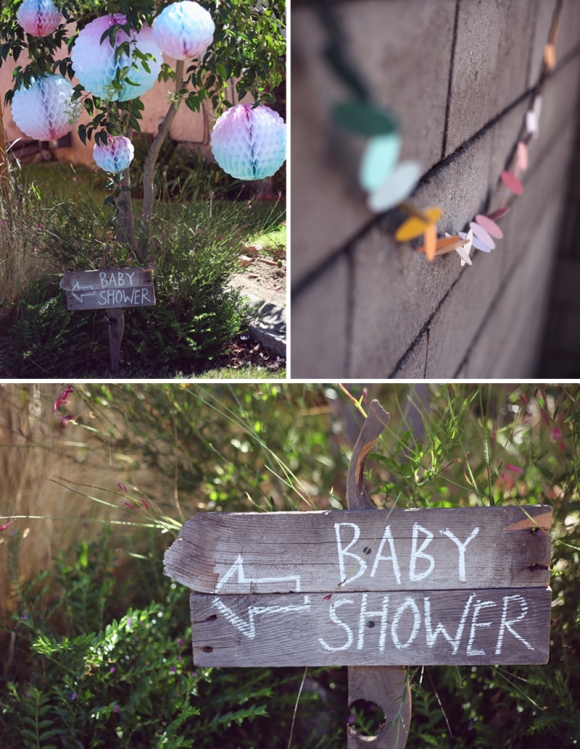
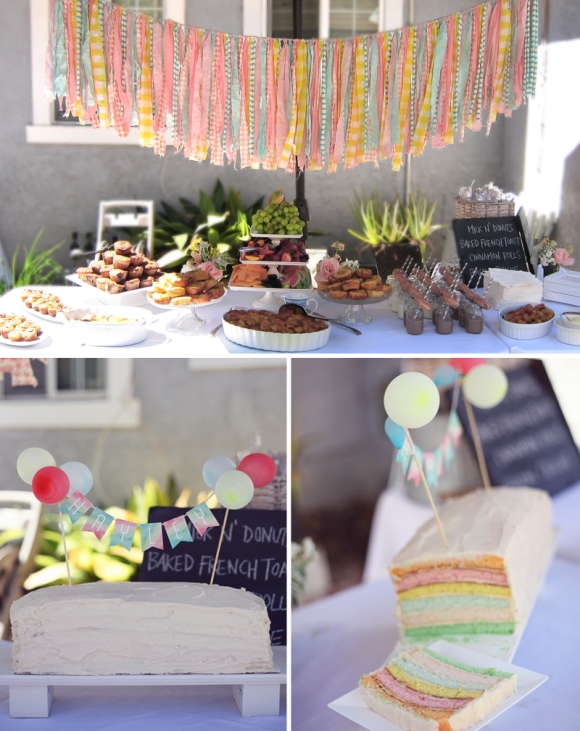
I took my inspiration from some vintage italian watercolored crepe paper party decorations that I found on Etsy. I became obsessed with finding some, but since they were vintage and seemingly one of a kind, I decided to create my own. I ordered white crepe paper balls online and used watercolors to delicately hand-paint them to match my palette. The styling of the baby shower slowly evolved into a vintage watercolor-esque affair. I found some inexpensive textile fabrics in varying patterns that fit nicely into my palette, and I tore them into strips and tied them to a string to create a backdrop for the buffet table. The paint chip garland was an easy and very cheap piece of decoration. I used a scalloped hole punch to create circles from paint swatches I picked up (for free!) at a hardware store. I glued them back-to-back with a string in between. The extra paint chips were scattered around the floral centerpieces to add some color to the white tablecloths.

I created a few chalkboard signs with plywood and chalkboard paint that I picked up from the local hardware store. That chalkboard paint is one of my new favorite craft supplies! I also used a wooden sign and two wooden jewelry boxes which I found at the craft store for under $5 to glue together a long white cake stand. I created little watercolor flags and small colored water balloons filled with air for the sign on the cake.

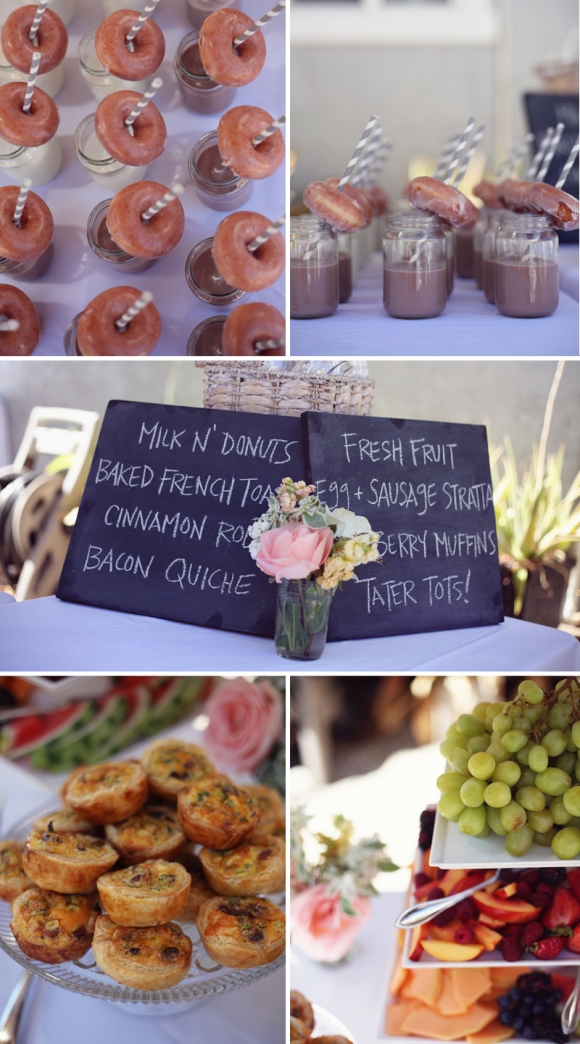
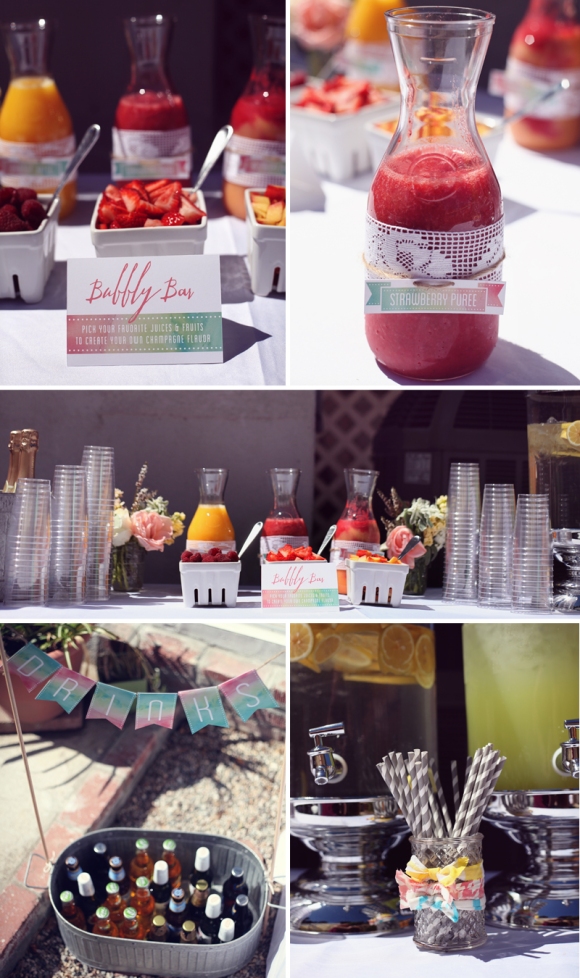
All of the food was homemade by myself and a few of our close friends who helped out, except for the Krispy Kreme donuts of course. I’d been saving baby food jars for months, so we served chocolate milk in the jars adorned with a paper straw and mini donut through the straw. They were a huge hit! On the menu was sausage & egg strata, muffins, a brown-sugar french toast bake, tater tots, mini quiches, cinnamon rolls and fresh fruit. For our beverage table, a “bubbly bar” with champagne, fruit puree and fresh fruit, as well as some non-alcoholic mixers for our preggo guest of honor.

The invitations and all the paper goods I designed and printed myself. Using watercolors, I painted several pages of ombre colors, which I used for all of the backgrounds on the invitations, signs, labels and flags. I used the extra watercolored paper to punch scalloped circles and assemble a watercolor chandelier for baby Hayley’s nursery. For the guest table, I used my grandma’s vintage wooden hutch. I designed “wishes for Hayley” cards for guests to write and clip onto fabric streamers hanging from tree branches. I also created a Meal Train sign up sheet that coordinated with all the paper goods from the party, and guests were able to sign up to bring Amy and Josh meals once Hayley arrived.

Overall, the baby shower was a beautiful event and I greatly treasure having the opportunity to host this for Amy.

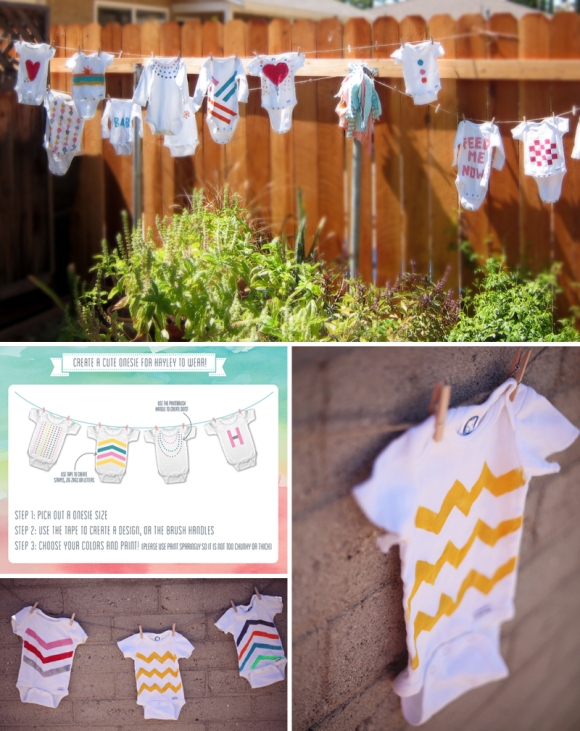
If anyone is interested in some of the crafts, DIY Tutorials are up on my blog:
Long Pastel layered cake
Watercolor Chandelier
Painted Onesies
Watercolor Party Decor + Paper goods
Paint Chip Garland
Baby Food jars for Donuts (how to get the sticky gunk off! :)

Credits:
Party planning + decor: eyeheartprettythings
Flower arrangements: Jessica Burns
Photography: Amy Stone Photography
Paper goods + Invitations: eyeheartprettythings
Donuts: Krispy Kreme
Craft supplies: Michael’s and Home Depot
Food: eyeheartprettythings , Jessica and friends
Tagged , , , , , , , , , , ,