Category Archives: Food

Summer Farmer’s Market Birthday Party

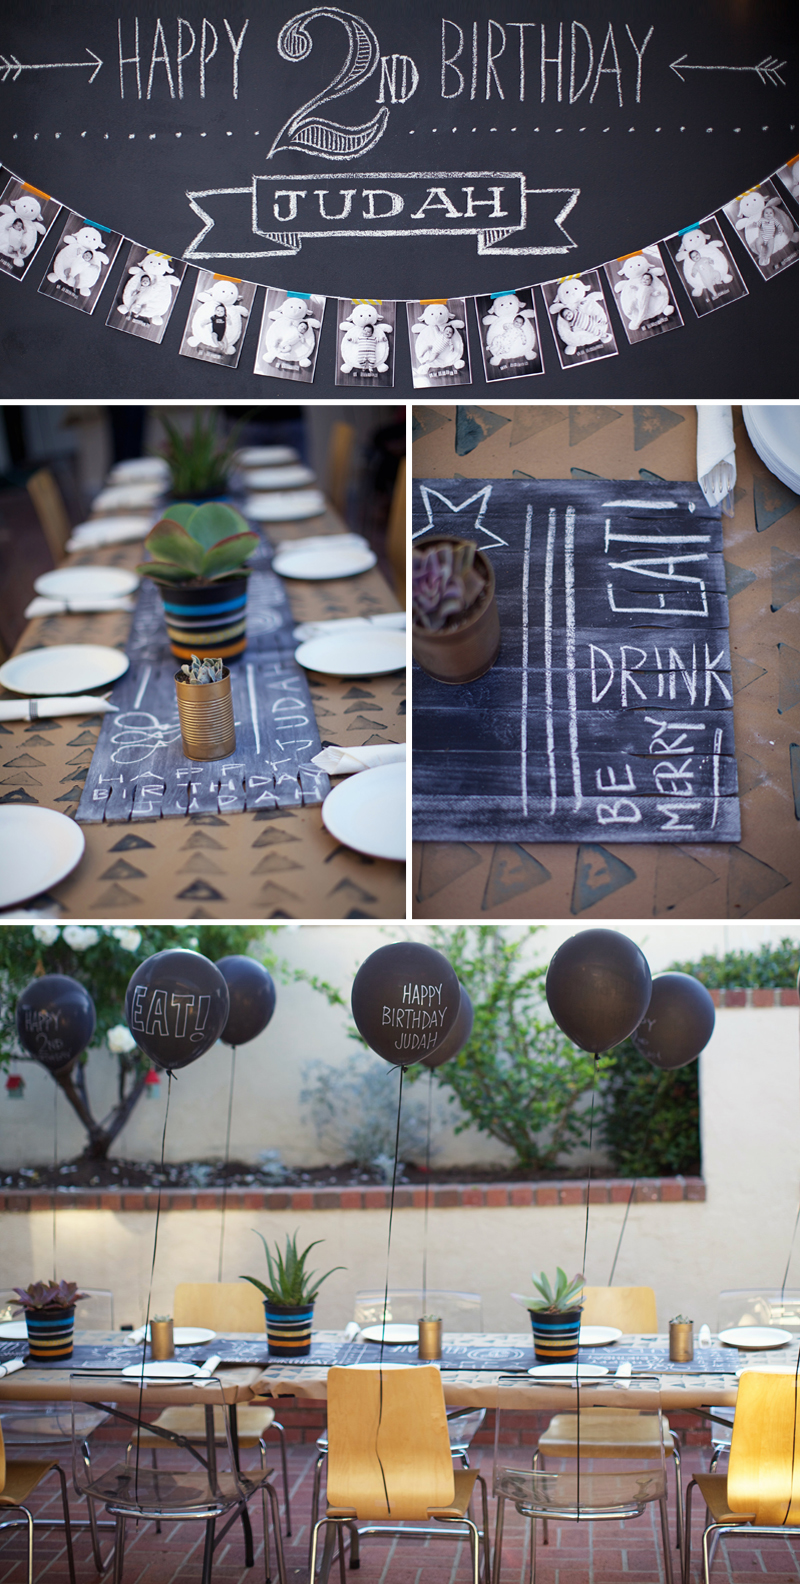
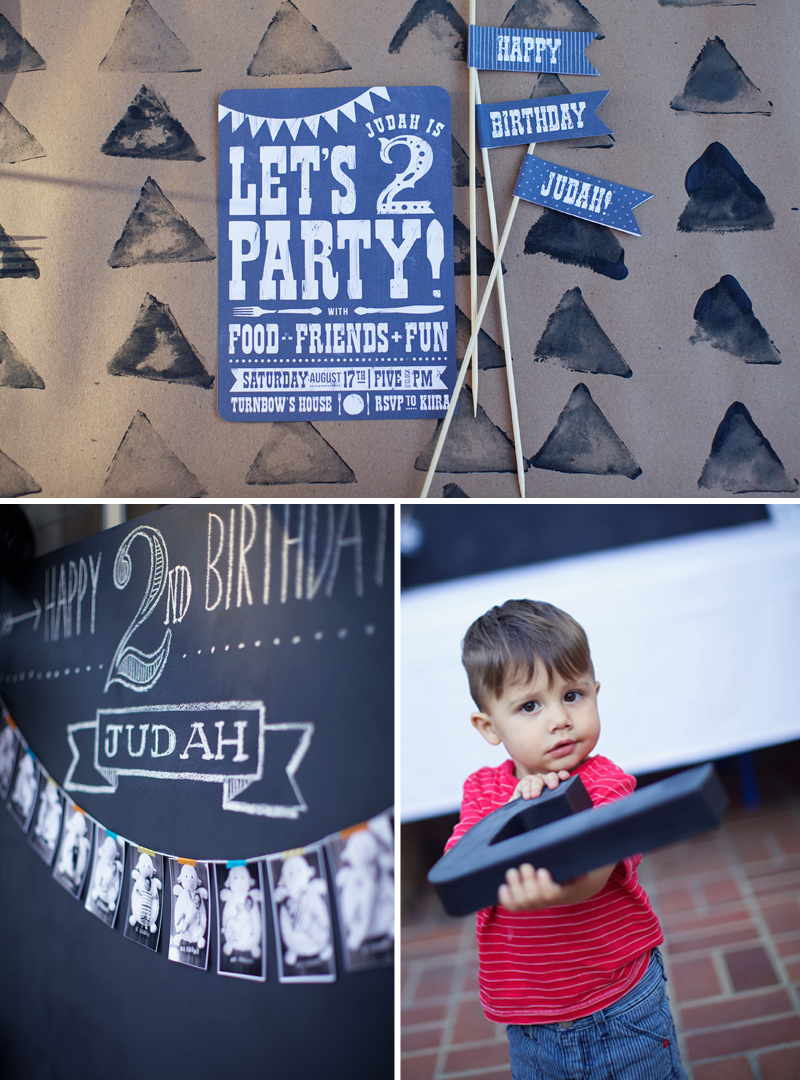
What’s a more perfect way to welcome summer than to throw an outdoor bash? I wanted to put together a festive BBQ, inspired by the amazing farmer’s markets that are so well known to California summers. This was a very DIY heavy party, as I needed it to stay low-budge, as always. :)
eyeheartprettythings+farmersmarket+birthday+invite
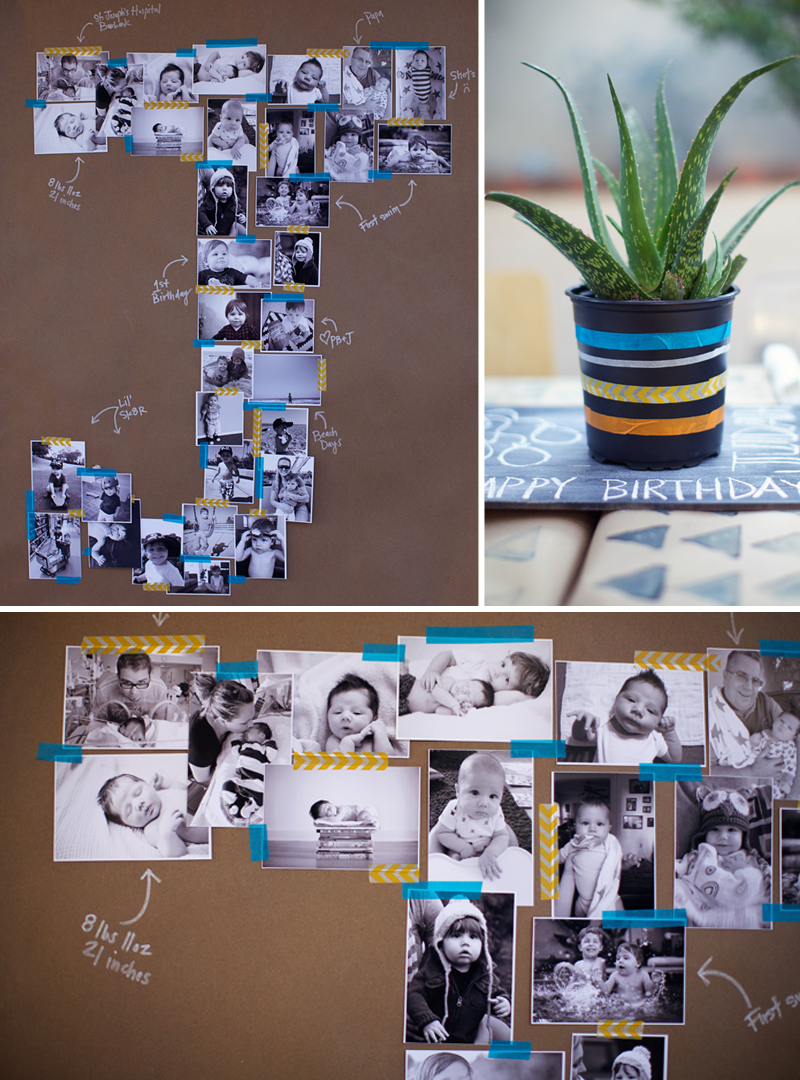
Some of my favorite details from this party are the paper goods and the cartons. Finding real, true vintage cans is not-so-easy. So I decided instead to create my own. All of the can labels I found online, printed and glued on myself. I’ve been saving large, extra large, medium and small cans for months. :) The vintage egg cartons and the turquoise berry baskets I found online from Bake it Pretty, and I couldn’t imagine the party without them. And you can’t have a party without paper straws, so the striped red and blue straws I found online from Can do Chefs.

I went to my local Joann’s fabric store and bought a yard of tiny red and white gingham fabric, which I cut into squares and folded into napkins. I also bought several yards of burlap and a large scale red and white checked fabric to use as tablecloths, much cheaper than buying a finished tablecloth. The loose cut of the fabric added to the rustic feel, so I didn’t mind the edges being unfinished.

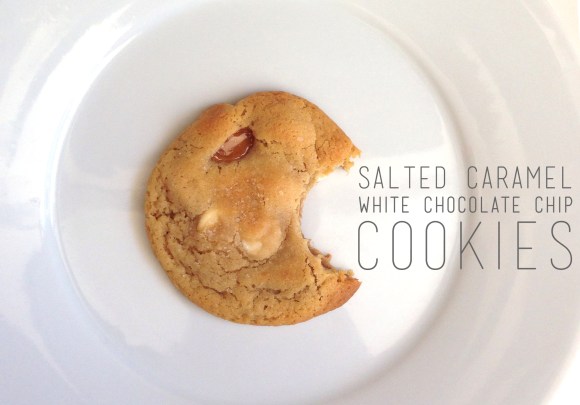
All the wire baskets and galvanized tubs were a slow collection from thrift and garage sale shopping. The flowers are wild flowers from friends gardens. No time to bake a cake from scratch this time around, but funfetti mini cupcakes fit the theme, lol. Overall the party was a wonderful summer gathering to celebrate our little one’s first birthday. We were overjoyed to share to occasion with all of our close friends and family :)

For a behind the scenes look at some of the DIY projects, go here.

Credits:
Party planning + decor: eyeheartprettythings
Flower arrangements: eyeheartprettythings
Photography: C.M.Elle Studios
Paper goods + Invitations: eyeheartprettythings
Craft supplies: Joann’s Fabrics and Michael’s
Extra Large Balloons: Bargain Balloons
Food + Cupcakes: eyeheartprettythings  + Pillsbury :)

eyeheartprettythings+farmersmarket+birthday+partyeyeheartprettythings+farmersmarket+birthday+foodeyeheartprettythings+farmersmarket+birthday+drinks+flowerseyeheartprettythings+farmersmarket+birthday+desserteyeheartprettythings+farmersmarket+birthday+boy+cake

Tagged , , , , , ,

Black + White Chalkboard Birthday BBQ

This party was a bit of a last minute idea born out of a can of chalkboard paint and a large piece of wood. My son’s birthday was quickly approaching, and I knew that I wanted to do a southern style bbq, but since it was mostly our adult friends, I wasn’t sure what style I should go with. I wanted something classic, simple but dramatic, with a lot of personal details and photos of my son’s first two years.

I went with black and white, it’s the two colors that always go well together. I painted a large piece of wood with black chalkboard paint as the table backdrop, and I printed a garland of black and white photos as a timeline of my little guy’s life from birth through 2 years. Instead of tablecloths, I lined the tables with brown builder’s paper, and used a sliced potato to stamp a triangle pattern on it. Check out the DIY here. As table runners, I glued paint sticks together and painted them with the same chalkboard paint. I wrote fun little messages along the table runners, drawings of balloons, stars, birthday cake.

This was a quick and easy party concept to execute. It would work for an anniversary party, adult birthday, or even just a classic barbecue. Enjoy!

eyeheartprettythings-chalkboard-birthday-party-tableeyeheartprettythings-chalkboard-birthday-party-invitationeyeheartprettythings-chalkboard-birthday-party-photocollageeyeheartprettythings-birthday-party-chalkboard-drinkseyeheartprettythings-chalkboard-birthday-party-food

Photos by Amy Stone

Tagged , , , , ,

The best cookie you’ve ever tasted

eyeheartprettythings-saltedcaramel-cookies

I don’t say this lightly, these are by far the best cookies you will ever taste. As someone who doesn’t like chocolate (jaws drop in astonishment and people are constantly trying to convince me that maybe I’ve never HAD good chocolate, or maybe I just don’t like MILK chocolate… No people, I literally hate ALL chocolate.) So I have never been able to appreciate that craving one can get for a moist, chewy, delicious cookie. To me, a cookie is a cookie, no big deal. Until I made these for the first time. Then I finally understood the danger of keeping butter, flour & sugar stocked in my pantry.

Ingredients:
1 cup unsalted butter, softened
3/4 cup granulated sugar
1 cup brown sugar
1/3 cup caramel sauce
1 tbs vanilla
2 eggs
3 3/4 cups flour
1/2 teaspoon salt
1 1/2 teaspoons baking soda
1/2 cups white chocolate chips
1 bag Werther’s chewy caramels, cut into pea size pieces
Kosher sea salt, for sprinkling

Set oven to 350 degrees. Beat together the butter, sugar & brown sugar with an electric mixer until fluffy. Mix in the caramel sauce & the vanilla. Add the eggs one at a time & mix until combined.

In a different bowl, mix together the flour, salt and baking soda. Slowly add flour mixture to your wet ingredients, blending until combined. With a spatula, gently fold in the white chocolate chips & caramel bits. Keep dough cool in the fridge until you’re ready to bake.

Scoop a spoonful of cold dough & roll into a ball. Place on a parchment paper lined baking sheet. Sprinkle with a pinch of sea salt. Bake for 12-15 minutes or until golden around edges. Remove and let cool for 5 minutes then transfer to wire rack.

Tip: For fluffier, chewier cookies, I pop the cookie sheet of dough balls into the fridge for 3 minutes before putting them in the oven to bake. The extra cold dough makes the cookies lighter & fluffier. If you want flatter more crunchy cookies, skip this step :)

eyeheartprettythings-saltedcaramel-cookies-diy-1

eyeheartprettythings-saltedcaramel-cookies-diy-2

You could easily modify this by adding chocolate chips instead of white chocolate, or even some broken up salted pretzel pieces might be tasty!

Recipe adapted from here.

Tagged , , ,

Strawberry Ice Cream Sandwiches

eyeheartprettythings-strawberry-ice-cream-sandwich

I made these strawberry ice cream sandwiches for a baby shower I hosted recently. I’m not a big chocolate lover (in fact, I hate chocolate) so I adapted this recipe to be non-chocolate and full of color.

Ingredients:
1/2 cup butter
1/3 cup brown sugar
1/4 cup granulated sugar
2 tbs milk
1/2 tsp vanilla extrat
1/4 tsp salt
1 1/4 cups flour
1/2 cup colored sprinkles
1 quart strawberry ice cream
Nonstick cooking spray

In a microwave safe bowl, melt together butter with brown sugar and granulated sugar.
Stir in the vanilla, salt and milk. Stir in the flour until smooth.

Line a large cookie sheet (or jelly roll pan) with parchment paper, extending past the edges. (this is so you can lift the flattened dough out once it’s frozen). Spray the parchment paper with nonstick spray. Press the dough into the pan on the parchment paper. Smooth it out to be as flat as you can, then sprinkle with colored sprinkles (the more the merrier!) Freeze for at least an hour. Meanwhile, take your strawberry ice cream out to get softened so it’s easier to spread.

After an hour, remove the frozen cookie dough. Cut it down the middle to create two large rectangles of cookie dough. Lift one of them out of the pan. Flip the other one around so the sprinkles face down on the parchment paper. Spread the softened ice cream on top in an even layer. Place second cookie dough layer on top, with sprinkles side up. Put back in the freezer for about an hour. Remove and slice into squares.

Tip: to keep the sandwiches from sticking when I stacked them, I cut long strips of parchment paper to wrap them up in.

eyeheartprettythings-strawberry-icecream-sandwich-diy

Follow me on instagram + twitter for more creative ideas & DIY projects!

Tagged , , , , ,

DIY Candy Sushi

I don’t know many kids who eat sushi, but I know some kids who LOVE this candy sushi! It’s such a creative treat for kids, and super simple too!
eyeheartprettythings candy sushi diy ninja birthday party
Supplies:
Rice Krispy cereal
Marshmallows
Fruit roll ups or Fruit by the Foot
Candy for inside (sour straws, gummy bears, etc)
Swedish fish

Sushi roll: Mix together some rice krispy treats (melted marshmallow’s and rice krispy cereal). Before the rice krispy mix hardens, form it into a long flat rectangle with your hands. Lay the rectangle onto a rolled out fruit roll up. Put some candy in the middle, and roll into a long log. Cut into 1″ wide rounds.
eyeheartprettythings-ninja-birthday-candysushi

Sashimi: Take rice krispy treat mix and form little flat rectangles (about the size of your thumb). Put a swedish fish on top and wrap with a strip of fruit roll up.
eyeheartprettythings-ninja-birthday-candysushi-sashimi

Follow me on instagram + twitter for more creative ideas & DIY projects!

Tagged , , , , , ,

My First Hosted Thanksgiving

This year was my first time hosting Thanksgiving in my own home. I was excited and nervous, but mostly nervous about timing the food and wrangling my kids + 20 family members. Due to that fact, I didn’t get to capture many photos as I’d have liked, besides a few on instagram, so my apologies for the crappy imagery. A little recap to follow…

Prepping everything the night beforeImage

Root vegetables ready for roasting…Image

This party is simply lovely, stretching out the skin of the turkey to make lots of room for BUTTER!Image

Yes…that is all butter and herbs…Image

Roasted turkey fresh out of the oven…see the steam rising? #nomnomImage

Snacks before dinner…cheese from Trader Joe’s, fruit & charcuterieImage

Me (hi!) carving the turkey the way I learned on YouTube ;)Image

Table for the adults! (kiddie’s not shown)Image

And we’re done! Special note to the amaze-balls Sausage + Celery root stuffing recipe borrowed from the beautiful Jessica Burns!

Image

XO

Follow me on instagram + twitter for more party ideas & DIY projects!

Tagged , , , , , , ,

Watercolor Baby Shower

This baby shower was very near and dear to my heart because it was for my closest friend Amy. Amy and I both love beautiful details, so I wanted to make this a very special party to celebrate their soon-to-arrive baby Hayley. This was a very DIY baby shower brunch. I was on a tight budget, so I was determined to hand-make everything that I could.

I took my inspiration from some vintage italian watercolored crepe paper party decorations that I found on Etsy. I became obsessed with finding some, but since they were vintage and seemingly one of a kind, I decided to create my own. I ordered white crepe paper balls online and used watercolors to delicately hand-paint them to match my palette. The styling of the baby shower slowly evolved into a vintage watercolor-esque affair. I found some inexpensive textile fabrics in varying patterns that fit nicely into my palette, and I tore them into strips and tied them to a string to create a backdrop for the buffet table. The paint chip garland was an easy and very cheap piece of decoration. I used a scalloped hole punch to create circles from paint swatches I picked up (for free!) at a hardware store. I glued them back-to-back with a string in between. The extra paint chips were scattered around the floral centerpieces to add some color to the white tablecloths.

I created a few chalkboard signs with plywood and chalkboard paint that I picked up from the local hardware store. That chalkboard paint is one of my new favorite craft supplies! I also used a wooden sign and two wooden jewelry boxes which I found at the craft store for under $5 to glue together a long white cake stand. I created little watercolor flags and small colored water balloons filled with air for the sign on the cake.

All of the food was homemade by myself and a few of our close friends who helped out, except for the Krispy Kreme donuts of course. I’d been saving baby food jars for months, so we served chocolate milk in the jars adorned with a paper straw and mini donut through the straw. They were a huge hit! On the menu was sausage & egg strata, muffins, a brown-sugar french toast bake, tater tots, mini quiches, cinnamon rolls and fresh fruit. For our beverage table, a “bubbly bar” with champagne, fruit puree and fresh fruit, as well as some non-alcoholic mixers for our preggo guest of honor.

The invitations and all the paper goods I designed and printed myself. Using watercolors, I painted several pages of ombre colors, which I used for all of the backgrounds on the invitations, signs, labels and flags. I used the extra watercolored paper to punch scalloped circles and assemble a watercolor chandelier for baby Hayley’s nursery. For the guest table, I used my grandma’s vintage wooden hutch. I designed “wishes for Hayley” cards for guests to write and clip onto fabric streamers hanging from tree branches. I also created a Meal Train sign up sheet that coordinated with all the paper goods from the party, and guests were able to sign up to bring Amy and Josh meals once Hayley arrived.

Overall, the baby shower was a beautiful event and I greatly treasure having the opportunity to host this for Amy.


If anyone is interested in some of the crafts, DIY Tutorials are up on my blog:
Long Pastel layered cake
Watercolor Chandelier
Painted Onesies
Watercolor Party Decor + Paper goods
Paint Chip Garland
Baby Food jars for Donuts (how to get the sticky gunk off! :)

Credits:
Party planning + decor: eyeheartprettythings
Flower arrangements: Jessica Burns
Photography: Amy Stone Photography
Paper goods + Invitations: eyeheartprettythings
Donuts: Krispy Kreme
Craft supplies: Michael’s and Home Depot
Food: eyeheartprettythings , Jessica and friends

Tagged , , , , , , , , , , ,

Pastel Layered Cake

Baking and assembling this cake took me the entire evening before the baby shower until the wee hours of the morning. I wanted a long, layered cake that would surprise everyone with beautiful pastel colors when it was sliced. I used 3 boxes of white cake mix and divided the batch into 6 separate bowls. I added a tiny amount of food coloring to each bowl, and spread each batch onto a jelly roll pan in order to get the long, thin layers. I baked them much less than the recommended bake time, because the layers are so thin. I kept a close eye on each batch to make sure they didn’t burn.

Once the cake was baked, I used a cardboard cake board that I found at Michael’s and cut it into a long rectangle. I used this to slice around to make sure each layer was the same exact size. Then I used the same cake board as the base, so that I would be able to transport the cake without it bending. I layered each color with a thick buttercream frosting, using extra frosting in the shallow areas to make the layers lay flat.

Overall, the cake was a little bit wonky because it was my first time trying this, but I think it turned out nicely given that I’m no pro baker :)

Tagged , , , , , , , , , , ,

Amazing! No-Flour No-Butter Peanut Butter Cookies

Today I woke up and felt this hankering to bake some cookies. Living in Los Angeles, it’s difficult to get excited for “Fall” weather since it’s pretty much non-existent. But the past few days, I haven’t been running the air conditioning, which translates to fall weather. So I’m excited to bust out my colored skinnies, lightweight scarves, t-shirts rather than tanks and bake me some cookies.

Unfortunately I didn’t have enough butter in my fridge to bake anything, so instead I found this recipe from The Kitchn the requires NO butter and NO flour, and they only take 10 minutes to bake. I literally whipped these bad boys up in less than 20 minutes. I am so stoked at the results. It’s a lighter, fluffier tasting peanut butter cookie. It has crunch, and  right out of the oven they’re soft, warm and yummy inside.

SUPER SIMPLE recipe for delicious NO-butter and Gluten Free peanut butter cookies:

Preheat oven to 375.

Ingredients:
1 cup peanut butter
3/4 cup white sugar
1/4 cup brown sugar
1 egg
1 teaspoon baking soda
1/2 teaspoon vanilla
additional sugar for rolling

In a bowl, mix all the ingredients. With a tablespoon, scoop and roll dough into balls (it will be sticky) and roll balls in the additional sugar. Place on a parchment-lined baking sheet approximately 2″ apart and flatten slightly with a fork in a crisscross pattern. Bake for 10 minutes. Remove and let cool for about 2 minutes before removing from baking sheet.

Enjoy!! XOXO Kiira

Tagged , , ,

Kitchen Endeavors this week

This week I tried two new things in the kitchen. First, I tried one ingredient banana ice cream. I have always had a very sweet tooth, and ice cream is definitely one of my major weaknesses. Since I don’t like chocolate, peanut butter & bananas have always been my “rich” flavors. So when I saw this super simple recipe for 2-ingredient peanut butter banana ice cream (without sugar! without cream!) I just had to have it. Instead of blending in the peanut butter, I swirled a small spoonful in after blending. I didn’t get a very great photo of it, because it started melting and Micah and I wanted to eat it right away! :)


Recipe:

Peel and slice 4 bananas into banana coins and place on a plate. Freeze them for 1-2 hours. Put frozen banana slices into a food processor (or powerful blender). Blend them, scraping down the sides every so often. It’ll look lumpy at first, but keep blending, and it turns into creamy banana ice cream :)

Then, this weekend Micah and I woke up early and decided to have some fun with pancakes. I made the pancake batter extra thin by adding a little more milk so that I could pour it into a squeeze bottle to make fun shapes on the pan. To get the best shapes, squeeze out the outline of your shape and then fill it in quickly.

This is our dinosaur pancake :)

Here is our caterpillar and butterfly pancakes

Pancake recipe:

1 1/2 cups flour
2 tablespoons sugar
2 teaspoons baking powder
1/2 teaspoon baking soda
1/2 teaspoon salt
1 1/4 cup milk (I used about 1 1/2 cup to make it thin)
2 eggs
2 tablespoons canola oil

Combine dry ingredients in a bowl. Add wet ingredients and mix. Spray non-stick spray on your pan and begin your pancake creations, flipping when you see bubbles (that was Micah’s job) :)