DIY Baby Shower String Monogram

eyeheartprettythings-diy-babyshower-monogram-yarn-string-craft-3

I first saw this idea over at Green Wedding Shoes and I fell in love with it. I stored it away in the back of my mind for the future and this baby shower was the perfect place for it.

This DIY is so easy and super affordable. My friend Amy and I knocked it out in about 30 minutes. Each ball of yarn was under $3, and the wood was only $7. I think in total we spent under $20 to make it.

Supplies:
– Piece of wood (you could use reclaimed wood or brand new from the hardware store)
– Paper to trace letters
– Ruler
– Xacto blade (or scissors)
– Nails (we used medium sized nails)
– Yarn

We found the wood at a hardware store and they cut it to size for us. I used plain white paper to trace out the letters, cut them out and hammer the nails around the border of the paper to create our outlines.

eyeheartprettythings-diy-babyshower-monogram-yarn-string-craft-1

Once you’ve got your outlines, take your yarn and begin wrapping around the nails, in whatever pattern you like. You could do horizontal lines, vertical lines, or geometric shapes like we did. Keep wrapping your yarn until you’ve filled the space between the board and the head of the nail. This gives you a deep dimensional look and makes the colors really pop off the board.

eyeheartprettythings-diy-babyshower-monogram-yarn-string-craft-2

I had some leftover wood and yarn so I created a heart shaped one as an extra accent piece.

eyeheartprettythings-diy-babyshower-monogram-yarn-string-heart-4

There is so much possibility with this DIY. You could create any shape you can think of (as long as you can make it with nails!) Perfect for hanging in a nursery, living room, kitchen or even to give as a gift. Nothing beats a thoughtful hand crafted gift. I’ll be making many more of these in the future! :)

Happy crafting!
XO
Kiira

Credits:
Photography: Amy Stone
Wood & Nails: Home Depot
Colored yarn: JoAnn’s Fabrics
Tagged , , , , ,

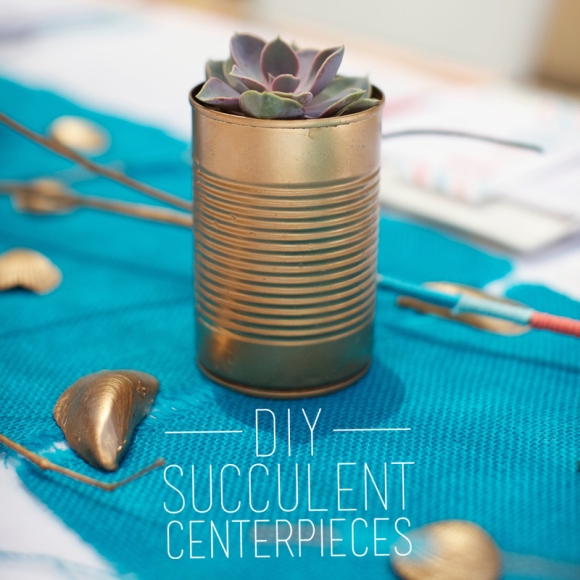
Simple, affordable DIY Succulent centerpieces

View More: http://amystonephoto.pass.us/marshallbabyshower

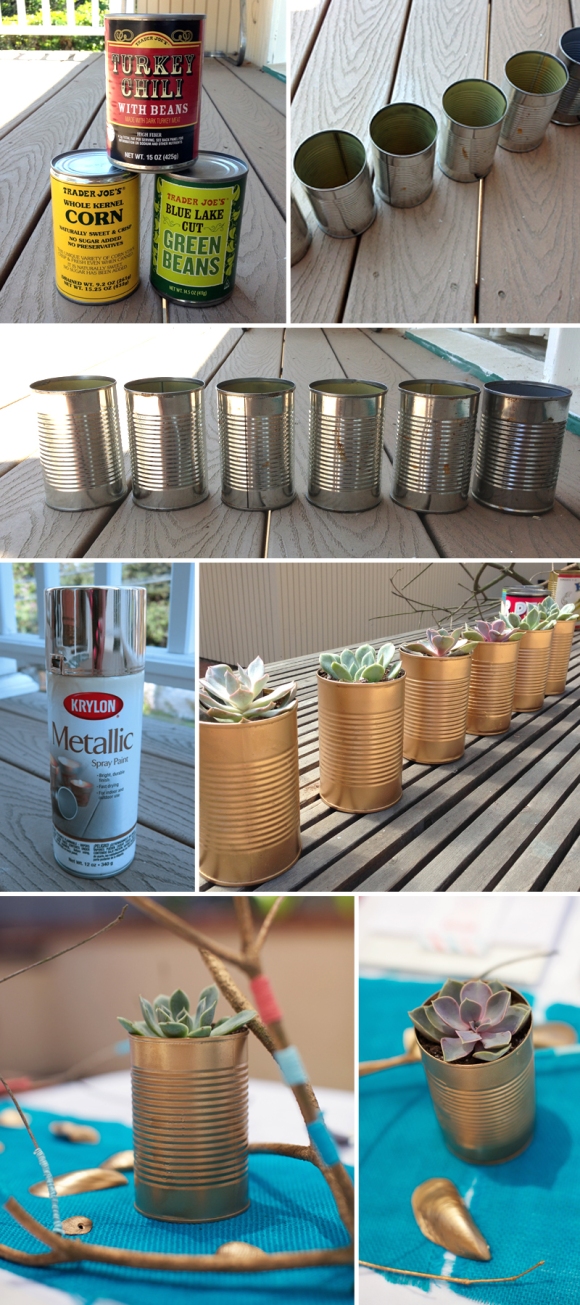
I wanted a simple and affordable solution for filling extra table space at a baby shower I was styling with my good friend and photographer Amy Stone. The colors were peach and turquoise, with hints of gold metallic. I had tons of old canned vegetable cans stored up, so I sprayed them metallic gold and planted miniature succulents in them as centerpieces. Super easy & super affordable. The spray paint was under $5 and the cans were leftover from my pantry food. The succulents were free since I clipped them from plants in my garden and re-planted them into dirt in the cans, but you could always head to your local nursery to pick some up or even Ikea sells mini succulents for $2.99!

Enjoy and happy planting!! :)
XO
Kiira

eyeheartprettythings-diy-succulent-gold-cans

To see more of my DIY, follow me on instagram + twitter!

Tagged , , , , , , , ,

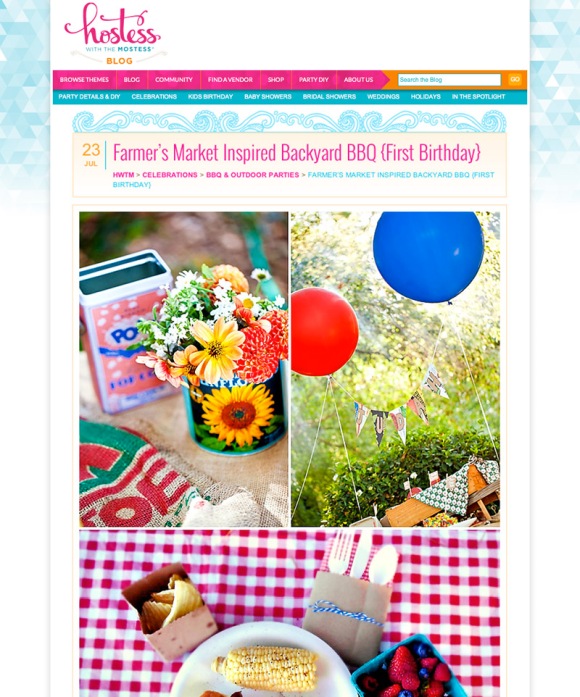
Featured by Hostess with the Mostess!

eyeheartprettythings-hwtm-backyard-bbq-farmersmarket

I’m super excited that Judah’s 1st birthday party is being featured today by Hostess with the Mostess! Check it out here, and check my blog for some of the affordable DIY decorations I created to make this party extra special :)

XO
Kiira

To see more glimpses into my day, check me out on Instagram!

Tagged , , , , ,

Nursery Rhyme Books Birth Announcement

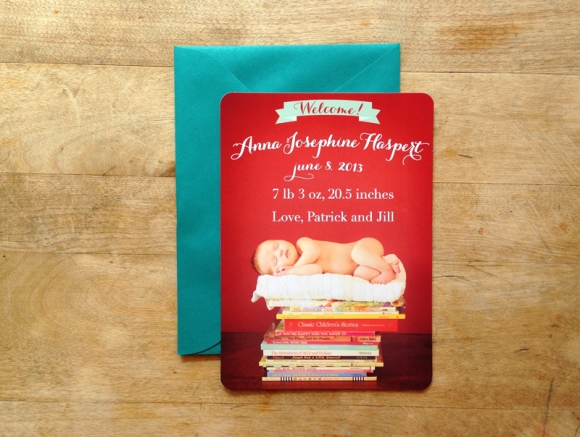
eyeheartprettythings-stationery-baby-announcement-card-books

I had the absolute privilege to design these birth announcements for baby Anna Josephine this month. What a doll!

Congratulations to Anna’s wonderful parents, Patrick and Jill.
You’ve got a beautiful little girl! :)

XO

To see more glimpses into my day, check me out on instagram + twitter!

Tagged , , ,

DIY Gold Confetti Stationery

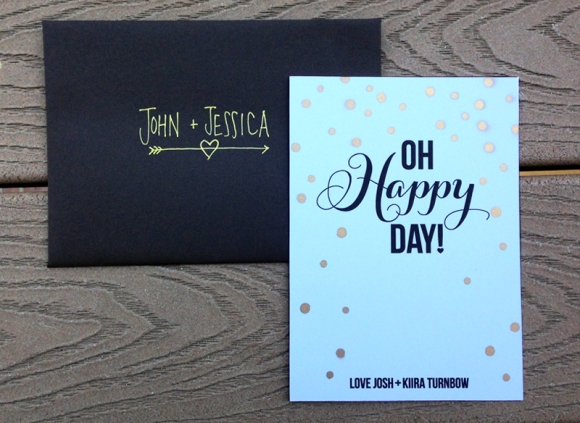
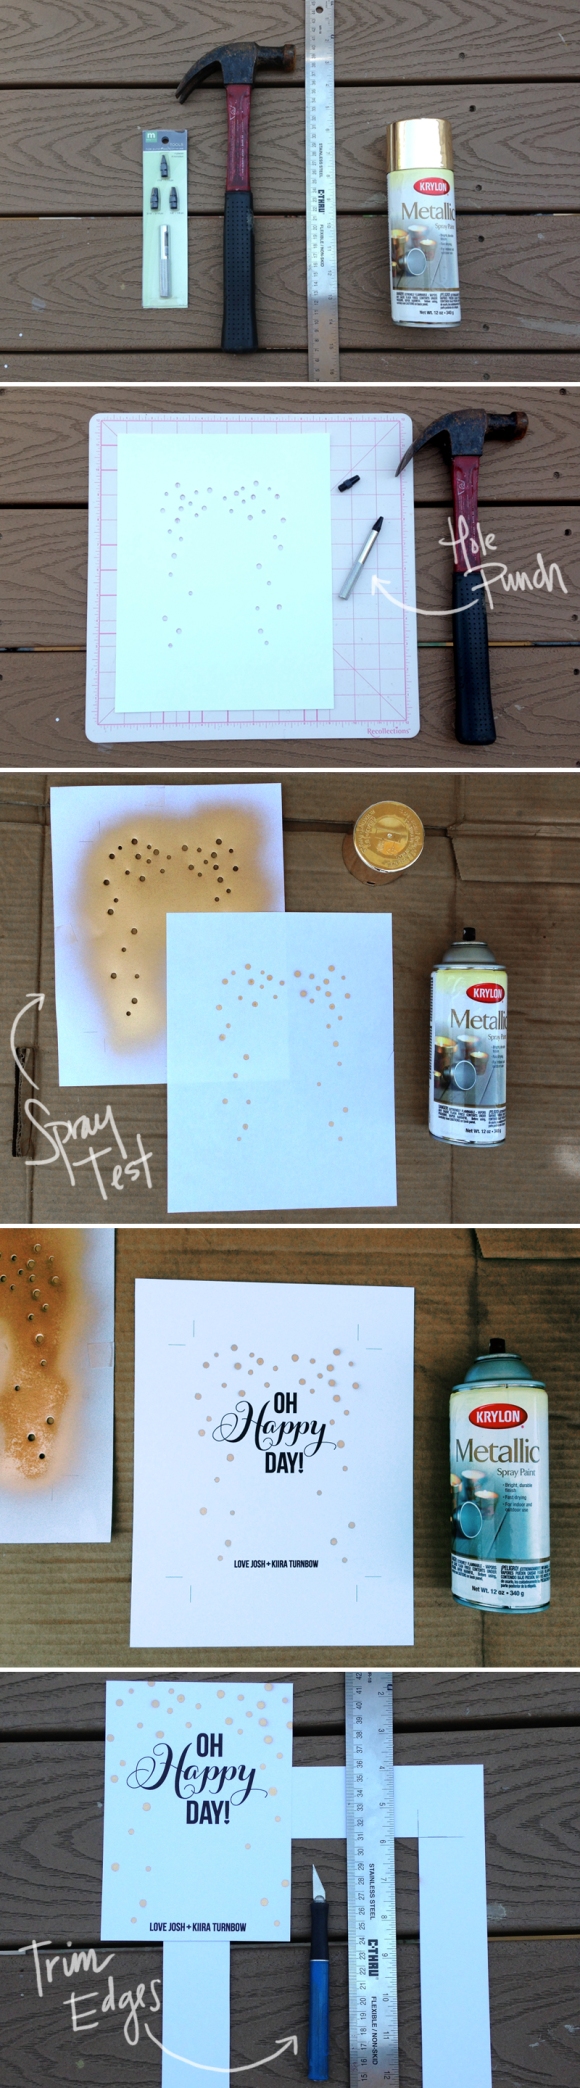
I’ve been going a little gold crazy lately. I bought a can of metallic gold spray paint for a crafty DIY baby shower I’m putting together with my friend Amy. We’ll post more on that in a bit ;) In the meantime, I’ve been finding all sorts of fun things to use metallic gold to accent with. Here I printed a simple black and white greeting card on my inkjet printer. Then created a cardstock stencil using varied hole punch sizes, lined it up on my card, sprayed, and voilà! A beautiful, handmade metallic confetti greeting card! You could do this any way you like, if you don’t have a printer you can handwrite a message or do calligraphy.

eyeheartprettythings-diy-gold-stationery-spraypaint-card-confetti

Supplies:
– White cardstock
– 1 can metallic gold spray paint
– Ruler
– X-acto blade
– Cutting mat (so you don’t cut through onto your floor or table)
– Hole punch
– Hammer

eyeheartprettythings-diy-gold-stationery-spraypaint-card-confetti

First, punch holes in a piece of cardstock in a pattern or design you like. I wanted mine to look like scattered pieces of confetti falling. I used two different sizes of hole punches that you hammer to punch through the paper. They come as a set at Michael’s craft store. Once you have your design, lay it flat onto a second piece of cardstock and do a test spray with your metallic spraypaint. It’s best if you can hold your stencil very tight so the spray can’t sneak under it. Once you’re ready, print (or write) on your greeting card. Then place it under the stecil, hold tight, and spray. When the paint has dried, cut along the measured lines with your x-acto blade on your cutting mat (I created a 5×7″ flat card). I used a metallic gold pen to address the envelope to tie them together :) Enjoy!

XO
Kiira

To see more DIY projects, check me out on instagram + twitter!

Tagged , , , , , ,

Summer Farmer’s Market DIY

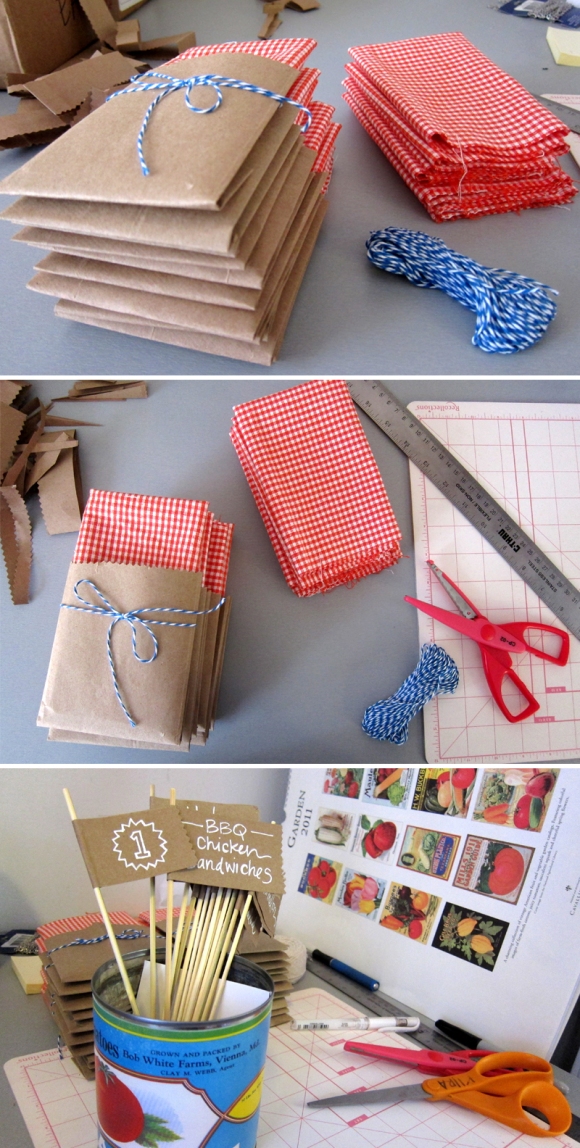
For most of the DIY’s for this party, I used brown craft paper, or recycled brown paper grocery bags (Trader Joe’s rocks!) I drew out a rough pattern to make teeny-tiny paper bags to hold chips. I rolled the paper to make popcorn cones. I folded the paper into little pouches (I’m an origami master at this point, lol) to hold the napkins & silverware, and tied them with blue baker’s twine. Pinking shears are a girls best friend, so I clipped the edges on all my bags & signs to give them a handmade but finished look. I used the leftover scraps of brown paper to fold little flags over wooden skewers (kabab sticks found in the cookware section of your grocery store!) to be my food signs. Then I hand lettered the words with a white gel pen, which I found at an office supply store.

eyeheartprettythings+diy+farmersmarket+gingham+napkin+flags

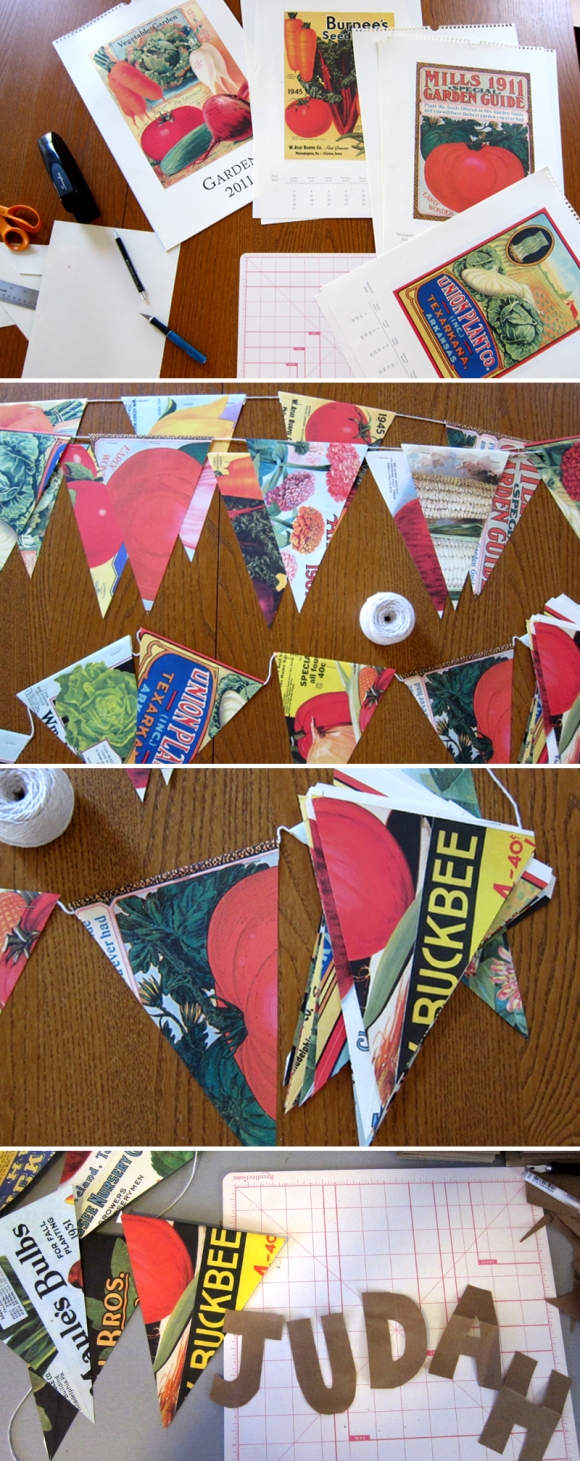
A super cute accent to any party is a string of bunting flags. I had an old gardening calendar that had wonderful fruit & vegetable graphics. I used it to cut simple triangle flags, folded the top, and stapled them over a string of white twine to make my farmer’s market bunting flags. I traced and cut out the letters J U D A H and pasted them on to personalize the flags.

eyeheartprettythings+diy+farmersmarket+bunting+flags

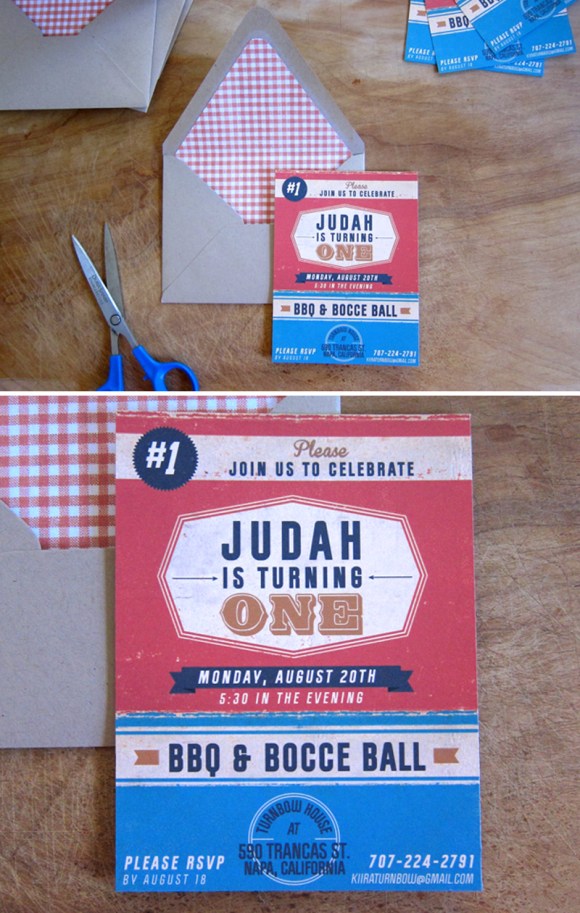
For the party invitations, I wanted a bright yet faded look, reminiscent of a vintage paint can or food label. I designed and printed them myself, and I found brown kraft paper envelopes at Paper Source. I printed and cut out the red gingham liners myself using a template I traced from the envelope shape.

eyeheartprettythings+diy+farmersmarket+invitation+birthday

To see more DIY projects and design inspiration, check me out on instagram + twitter!

Bottle obsession

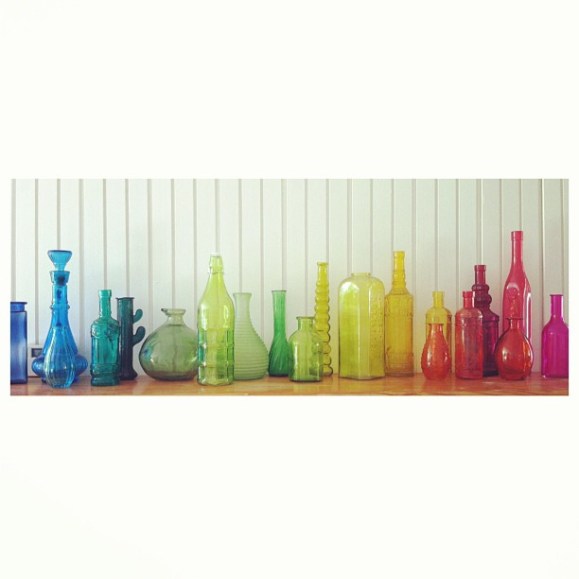
eyeheartprettythings+rainbow+pretty+coloredbottles+decor+house

Every time I drive past a yard sale, I can’t help myself. I love collecting people’s old neglected pretty things. My colored glass bottle collection has grown over the years and it’s almost too large to span my bookshelf anymore. But I can’t stop myself. :)

I was super excited today to unpack them and set them up in my new house. I’ll be posting more photos of the house in the coming weeks as everything gets squared away and boxes are unpacked. For more unofficial glimpses into my world, follow me on instagram + twitter!

Spring Mini Sessions this weekend!

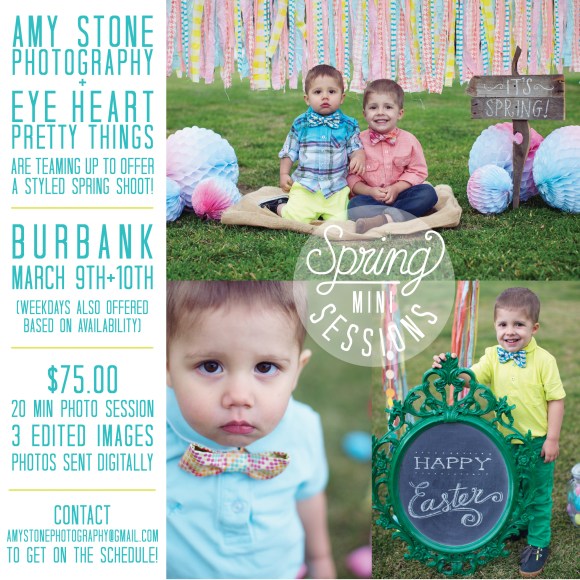
Remember those cute bow-ties I was sewing last week? Well there’s a reason I made so many. :) I’m super excited to announce that Amy Stone I are teaming up to offer a Spring styled photo session for you and your family this weekend! Saturday March 9th and Sunday March 10th in Burbank, California.

Your kids + adorable Easter details + bright fun bow-ties, all at a wonderful outdoor location! Just show up with your kids dressed in something colorful and cute and have some amazing moments captured for you.

Sessions will be 20 minutes long, and 3 final edited photos will be delivered digitally. If you’d like additional images, ordering will be available.

Email amystonephotography@gmail.com to get on the schedule. We can also offer a few weekday slots if the weekend is too busy for you, just email Amy soon to book your session :)

Spring-Mini-Sessions

Tagged , , , , , , , ,

DIY Bow Ties for Easter!

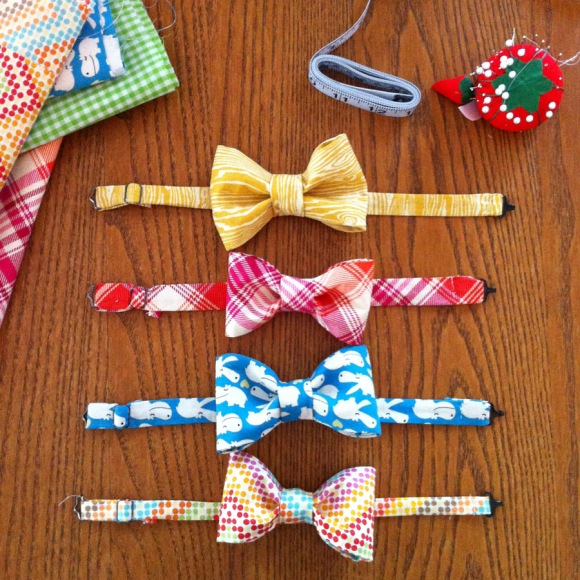
I came across an amazing tutorial on how to easily make a bow tie on prudentbaby.com. My close friend Amy and I became obsessed with making them for an Easter photoshoot with my boys, so we immediately drove to Michael Levine in downtown LA to find as much cute fabric as we could. Then we dragged my ancient sewing machine from the back of my garage, buried under Christmas decorations and bins of baby clothes, and made these little guys. I’m in love! I think the plaid one is my absolute favorite :)

eyeheartprettythings+bowties+diy


Check out the tutorial and very helpful step-by-step instructions over at prudent baby.


Tagged , , , , , ,